在 RHEL/CentOS 7 中为多个 Linux 发行版安装设置“PXE 网络启动服务器”
PXE 服务器- 预启动执行环境 - 指示客户端计算机直接从网络接口启动、运行或安装操作系统,无需刻录 CD/DVD 或使用物理介质,或者可以简化在多台机器上的网络基础架构上同时安装 Linux 发行版的工作。
要求
- CentOS 7 最小安装程序
- RHEL 7 最小安装程序
- 在 RHEL/CentOS 7 中配置静态 IP 地址
- 在 RHEL/CentOS 7 中删除不需要的服务
- 安装 NTP 服务器以在 RHEL/CentOS 7 中设置正确的系统时间
本文将解释如何在DNSMASQ服务器的帮助下,使用镜像本地安装存储库(CentOS 7 DVD ISO 映像提供的源)在RHEL / CentOS 7 x64 位上安装和配置PXE 服务器。
它提供DNS和DHCP服务、Syslinux包提供用于网络启动的引导程序、TFTP 服务器(使可启动映像可通过网络使用简单文件传输协议(TFTP) 下载)和VSFTPD服务器(将托管本地安装的镜像 DVD 映像 - 该服务器将作为官方 RHEL/CentOS 7 镜像安装存储库,安装程序将从中提取其所需的软件包。
步骤 1:安装并配置 DNSMASQ 服务器
1.无需提醒您,绝对要求您的一个网卡接口(如果您的服务器有多块网卡)必须配置一个静态 IP 地址,该地址必须属于提供 PXE 服务的网段的同一 IP 范围。
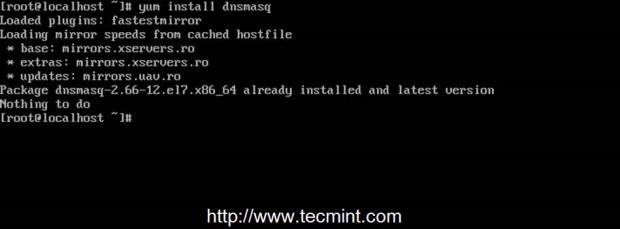
因此,在配置静态 IP 地址、更新系统并执行其他初始设置后,使用以下命令安装DNSMASQ守护程序。
# yum install dnsmasq
2. DNSMASQ 的主要默认配置文件位于/etc目录中,它是不言自明的,但由于其高度注释的解释,因此编辑起来相当困难。
首先确保备份此文件,以便以后需要查看,然后通过发出以下命令,使用您最喜欢的文本编辑器创建一个新的空白配置文件。
# mv /etc/dnsmasq.conf  /etc/dnsmasq.conf.backup
# nano /etc/dnsmasq.conf
3.现在,复制并粘贴以下配置到dnsmasq.conf文件,并确保您更改下面解释的语句以匹配您的网络设置。
interface=eno16777736,lo
#bind-interfaces
domain=centos7.lan
# DHCP range-leases
dhcp-range= eno16777736,192.168.1.3,192.168.1.253,255.255.255.0,1h
# PXE
dhcp-boot=pxelinux.0,pxeserver,192.168.1.20
# Gateway
dhcp-option=3,192.168.1.1
# DNS
dhcp-option=6,92.168.1.1, 8.8.8.8
server=8.8.4.4
# Broadcast Address
dhcp-option=28,10.0.0.255
# NTP Server
dhcp-option=42,0.0.0.0

pxe-prompt="Press F8 for menu.", 60
pxe-service=x86PC, "Install CentOS 7 from network server 192.168.1.20", pxelinux
enable-tftp
tftp-root=/var/lib/tftpboot
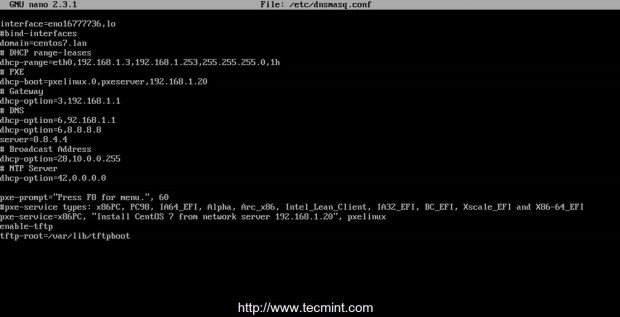
需要更改的语句如下:
- 接口– 服务器应该监听并提供服务的接口。
- bind-interfaces – 取消注释以便仅在该接口上绑定。
- 域– 将其替换为您的域名。
- dhcp-range – 将其替换为您在此网段上的网络掩码定义的 IP 范围。
- dhcp-boot – 用您的接口 IP 地址替换 IP 语句。
- dhcp-option= 3,192.168.1.1 – 将 IP 地址替换为您的网段网关。
- dhcp-option= 6,92.168.1.1 – 用您的 DNS 服务器 IP 替换 IP 地址 – 可以定义多个 DNS IP。
- server=8.8.4.4 – 放置您的 DNS 转发器 IP 地址。
- dhcp-option= 28,10.0.0.255 – 可选用网络广播地址替换 IP 地址。
- dhcp-option=42,0.0.0.0 – 放置您的网络时间服务器 – 可选(0.0.0.0 地址供自我参考)。
- pxe-prompt – 保留默认设置 – 表示按 F8 键进入菜单 60,等待时间为秒。
- pxe=service – 对于 32 位/64 位架构使用 x86PC,并在字符串引号下输入菜单描述提示。其他值类型可以是:PC98、IA64_EFI、Alpha、Arc_x86、Intel_Lean_Client、IA32_EFI、BC_EFI、Xscale_EFI 和 X86-64_EFI。
- enable-tftp – 启用内置 TFTP 服务器。
- tftp-root – 使用 /var/lib/tftpboot – 所有网络启动文件的位置。
有关配置文件的其他高级选项,请阅读dnsmasq 手册。
步骤2:安装SYSLINUX引导加载程序
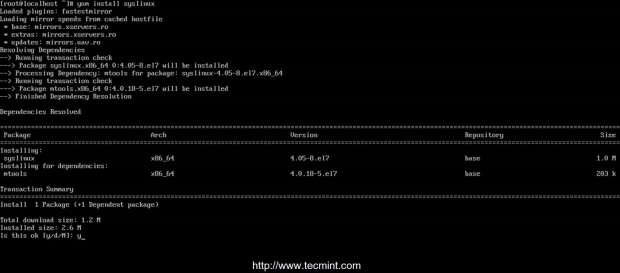
4.编辑并保存DNSMASQ主配置文件后,继续并通过发出以下命令安装Syslinx PXE 引导加载程序包。
# yum install syslinux
5. PXE 引导加载程序文件位于/usr/share/syslinux绝对系统路径中,因此您可以通过列出此路径内容来检查它。此步骤是可选的,但您可能需要注意此路径,因为在下一步中,我们将把其所有内容复制到TFTP 服务器路径。
# ls /usr/share/syslinux

步骤 3:安装 TFTP 服务器并使用 SYSLINUX 引导加载程序填充它
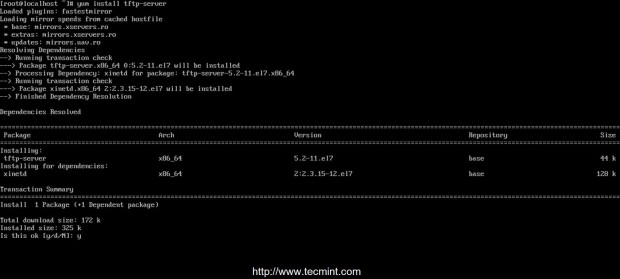
6.现在,让我们进入下一步,安装TFTP 服务器,然后通过以下命令将 Syslinux 包提供的所有 bootloders 文件从上面列出的位置复制到/var/lib/tftpboot路径。
# yum install tftp-server
# cp -r /usr/share/syslinux/* /var/lib/tftpboot
步骤4:设置PXE服务器配置文件
7.通常,PXE 服务器从名为pxelinux.cfg的文件夹中托管的一组特定文件(GUID文件 - 第一个,MAC文件 - 下一个,默认文件 - 最后一个)中读取其配置,该文件夹必须位于DNSMASQ 主配置文件中的tftp-root语句中指定的目录中。
通过发出以下命令创建所需的目录pxelinux.cfg并用默认文件填充它。
# mkdir /var/lib/tftpboot/pxelinux.cfg
# touch /var/lib/tftpboot/pxelinux.cfg/default
8.现在是时候使用有效的 Linux 发行版安装选项编辑PXE 服务器配置文件了。还请注意,此文件中使用的所有路径都必须相对于/var/lib/tftpboot目录。
下面您可以看到一个示例配置文件,您可以使用它,但修改安装映像(内核和 initrd 文件)、协议(FTP、HTTP、HTTPS、NFS)和 IP,以相应地反映您的网络安装源存储库和路径。
# nano /var/lib/tftpboot/pxelinux.cfg/default
将以下整个摘录添加到文件中。
default menu.c32
prompt 0
timeout 300
ONTIMEOUT local

menu title ########## PXE Boot Menu ##########

label 1
menu label ^1) Install CentOS 7 x64 with Local Repo
kernel centos7/vmlinuz
append initrd=centos7/initrd.img method=ftp://192.168.1.20/pub devfs=nomount

label 2
menu label ^2) Install CentOS 7 x64 with http://mirror.centos.org Repo
kernel centos7/vmlinuz
append initrd=centos7/initrd.img method=http://mirror.centos.org/centos/7/os/x86_64/ devfs=nomount ip=dhcp

label 3
menu label ^3) Install CentOS 7 x64 with Local Repo using VNC
kernel centos7/vmlinuz
append  initrd=centos7/initrd.img method=ftp://192.168.1.20/pub devfs=nomount inst.vnc inst.vncpassword=password

label 4
menu label ^4) Boot from local drive
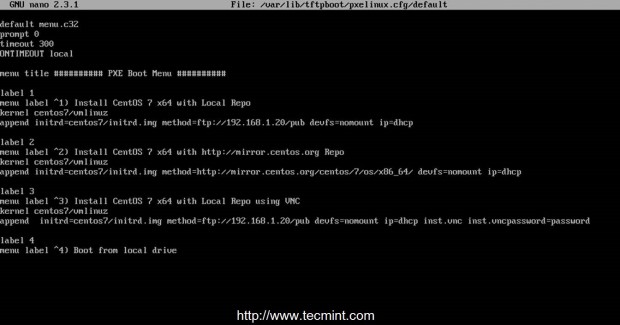
如您所见,CentOS 7 启动映像(内核和 initrd)位于相对于/var/lib/tftpboot的名为centos7的目录中(在绝对系统路径上,这意味着/var/lib/tftpboot/centos7),并且可以通过在192.168.1.20/pub网络位置上使用FTP协议访问安装程序存储库- 在这种情况下,存储库托管在本地,因为 IP 地址与 PXE 服务器地址相同)。
另外,菜单标签 3指定客户端安装应通过VNC从远程位置完成(此处用强密码替换 VNC 密码),以防您在无头客户端上安装,并且菜单标签 2指定
安装源为 CentOS 7 官方互联网镜像(这种情况需要通过 DHCP 和 NAT 在客户端上提供互联网连接)。
重要提示:正如您在上面的配置中看到的,我们使用 CentOS 7 用于演示目的,但您也可以定义 RHEL 7 映像,并且以下整个说明和配置仅基于 CentOS 7,因此在选择发行版时要小心。
步骤5:将CentOS 7启动映像添加到PXE服务器
9.此步骤需要 CentOS 内核和 initrd 文件。要获取这些文件,您需要CentOS 7 DVD ISO映像。因此,继续下载 CentOS DVD 映像,将其放入 DVD 驱动器,然后通过发出以下命令将映像安装到/mnt系统路径。
使用 DVD 而不是最小 CD 映像的原因是,稍后此 DVD 内容将用于创建FTP
源
的本地安装程序存储库。
# mount -o loop /dev/cdrom  /mnt
# ls /mnt

如果您的机器没有 DVD 驱动器,您也可以使用wget或curl实用程序从CentOS 镜像本地下载CentOS 7 DVD ISO并挂载它。
# wget http://mirrors.xservers.ro/centos/7.0.1406/isos/x86_64/CentOS-7.0-1406-x86_64-DVD.iso
# mount -o loop /path/to/centos-dvd.iso  /mnt
10. DVD 内容可用后,创建centos7目录并将 CentOS 7 可启动内核和 initrd 映像从 DVD 挂载位置复制到 centos7 文件夹结构。
# mkdir /var/lib/tftpboot/centos7
# cp /mnt/images/pxeboot/vmlinuz  /var/lib/tftpboot/centos7
# cp /mnt/images/pxeboot/initrd.img  /var/lib/tftpboot/centos7

使用这种方法的原因是,以后您可以在/var/lib/tftpboot路径中创建新的单独目录,并将其他 Linux 发行版添加到 PXE 菜单,而不会弄乱整个目录结构。
第6步:创建CentOS 7本地镜像安装源
11.虽然您可以通过多种协议(例如 HTTP、HTTPS 或 NFS)设置安装源镜像,但对于本指南,我选择了FTP协议,因为它非常可靠,并且在vsftpd服务器的帮助下易于设置。
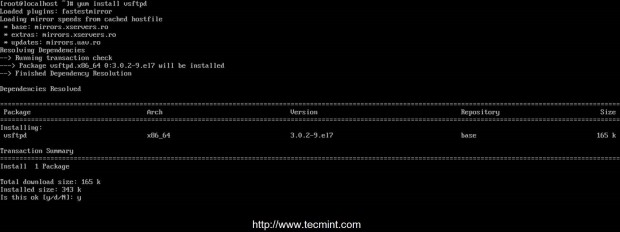
进一步安装 vsftpd 守护程序,将所有 DVD 安装内容复制到vsftpd默认服务器路径(/var/ftp/pub) - 这可能需要一段时间,具体取决于您的系统资源,并通过发出以下命令将可读权限附加到此路径。
# yum install vsftpd
# cp -r /mnt/*  /var/ftp/pub/
# chmod -R 755 /var/ftp/pub


步骤 7:启动并启用系统范围内的守护进程
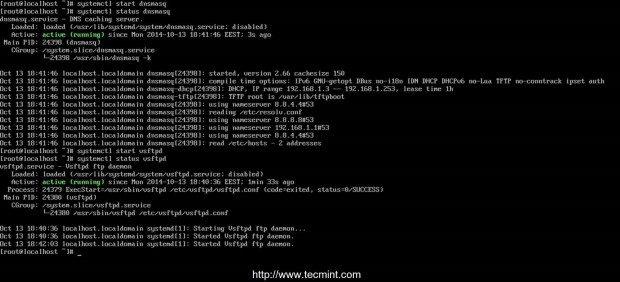
12.现在 PXE 服务器配置终于完成了,通过运行以下命令,启动DNSMASQ和VSFTPD服务器,验证其状态并在整个系统范围内启用它,以便在每次系统重启后自动启动。
# systemctl start dnsmasq
# systemctl status dnsmasq
# systemctl start vsftpd
# systemctl status vsftpd
# systemctl enable dnsmasq
# systemctl enable vsftpd

步骤8:打开防火墙并测试FTP安装源
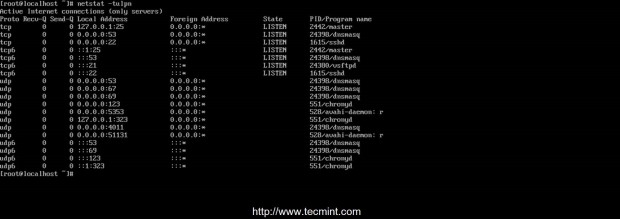
13.为了获取客户端机器访问 PXE 服务器并从其启动所需的防火墙上打开的所有端口的列表,请运行netstat命令并相应地将 CentOS 7 Firewalld 规则添加到 dnsmasq 和 vsftpd 监听端口。
# netstat -tulpn
# firewall-cmd --add-service=ftp --permanent  	## Port 21
# firewall-cmd --add-service=dns --permanent  	## Port 53
# firewall-cmd --add-service=dhcp --permanent  	## Port 67
# firewall-cmd --add-port=69/udp --permanent  	## Port for TFTP
# firewall-cmd --add-port=4011/udp --permanent  ## Port for ProxyDHCP
# firewall-cmd --reload  ## Apply rules

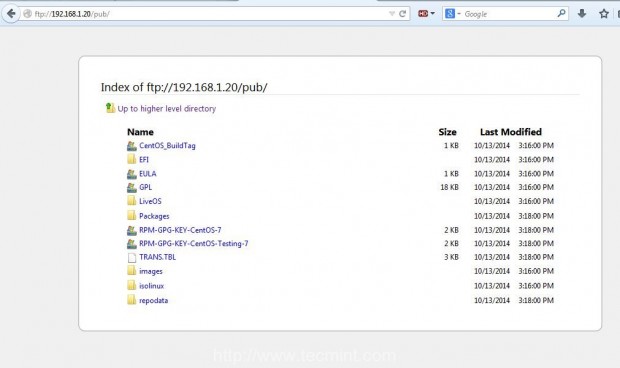
14.要测试 FTP 安装源网络路径,请在本地( lynx应该可以)或另一台计算机上打开浏览器,然后在 URL 字段中使用
FTP 协议输入 PXE 服务器的 IP 地址,后跟/pub网络位置,结果应如下面的屏幕截图所示。
ftp://192.168.1.20/pub
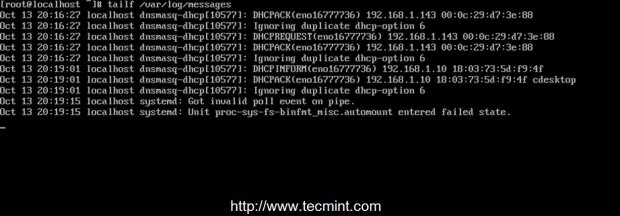
15. To debug PXE server for eventual misconfigurations or other information and diagnostics in live mode run the following command.
# tailf /var/log/messages
16. Finally, the last required step that you need to do is to unmount CentOS 7 DVD and remove the physical medium.
# umount /mnt
Step 9: Configure Clients to Boot from Network
17. Now your clients can boot and install CentOS 7 on their machines by configuring Network Boot as primary boot device from their systems BIOS or by hitting a specified key during BIOS POST operations as specified in motherboard manual.
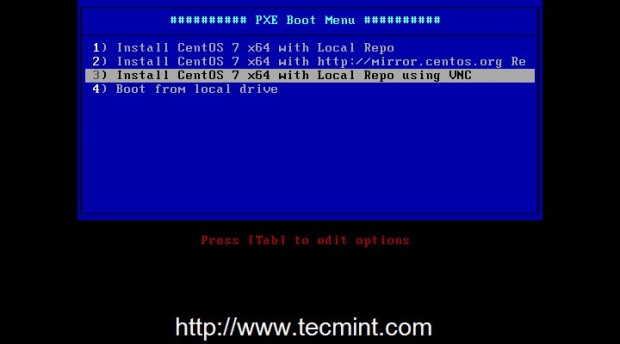
In order to choose network booting. After first PXE prompt appears, press F8 key to enter presentation and then hit Enter key to proceed forward to PXE menu.


18. Once you have reached PXE menu, choose your CentOS 7 installation type, hit Enter key and continue with the installation procedure the same way as you might install it from a local media boot device.
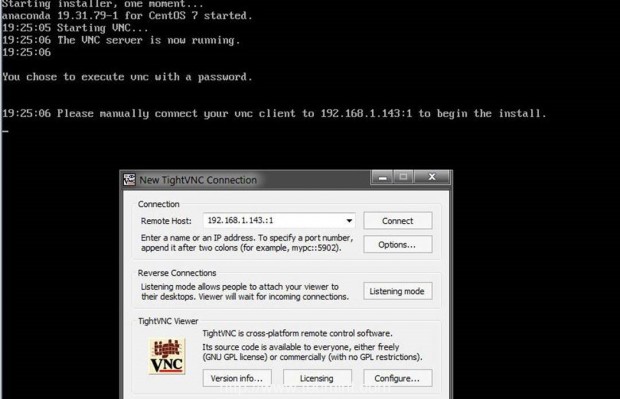
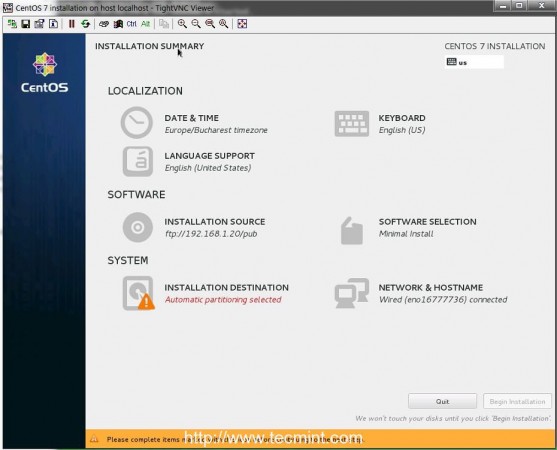
Please note down that using variant 2 from this menu requires an active Internet connection on the target client. Also, on below
screenshots you can see an example of a client remote installation via VNC.
That’s all for setting up a minimal PXE Server on CentOS 7. On my next article from this series, I will discuss other issues concerning this PXE server configuration such as how to setup automated installations of CentOS 7 using Kickstart files and adding other Linux distributions to PXE menu – Ubuntu Server and Debian 7.
