在 Gentoo Linux 中安装 LEMP(Linux、Nginx、MySQL/MariaDB、PHP/PHP-FPM 和 PhpMyAdmin)
Gentoo是速度最快的 Linux 发行版之一,因为它从源代码构建,并通过其软件管理程序Portage提供了构建完整的 Web 开发平台所需的某些工具,该平台运行速度非常快,并且具有高度的定制化。

本主题将引导您逐步完成使用LEMP(Linux Nginx、MySQL/MariaDB、PHP-FPM/PhpMyadmin)构建完整 Web 环境平台的安装过程,并借助Portage 包管理提供的USE 标志的帮助,它在编译过程中提供了一组包功能 - Web 平台所需的模块或设置,将高度调整服务器配置。
要求
- 使用面向 Internet 服务器的强化配置文件安装 Gentoo – Gentoo 安装指南。
- 配置了静态 IP 地址的网络。
步骤1:安装Nginx Web服务器
1.在尝试继续安装 Nginx 之前,请确保您的 NIC 已配置静态 IP 地址,并确保 Portage 源和系统都是最新的。
$ sudo su -
# emerge --sync
# emerge --update --deep --with-bdeps=y @world
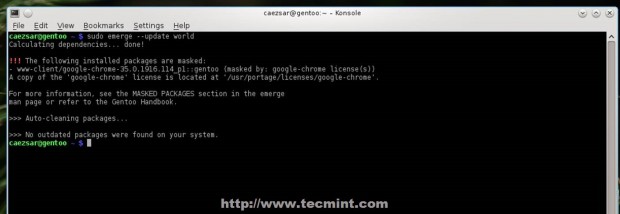
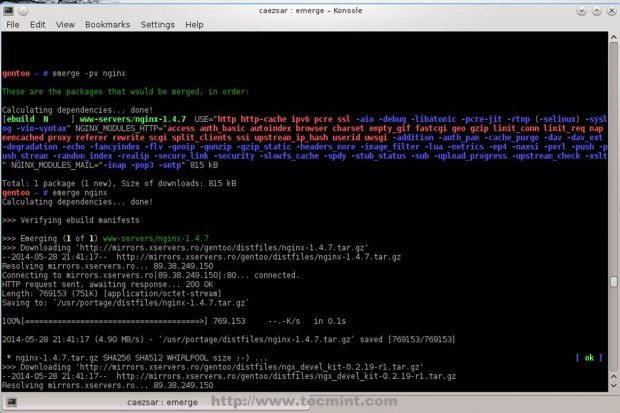
2.更新过程完成后,通过将Nginx USE 标志回显到 Portage make.conf文件来选择首选设置和模块,继续安装 Nginx 。首先通过运行以下命令列出 Nginx 默认安装模块。
# emerge -pv nginx
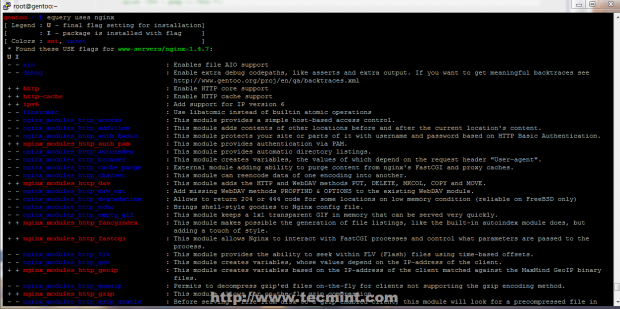
有关详细的模块信息(包的 USE 标志)请使用equery命令。
# equery uses nginx
然后使用以下命令安装 Nginx。
# emerge --ask nginx
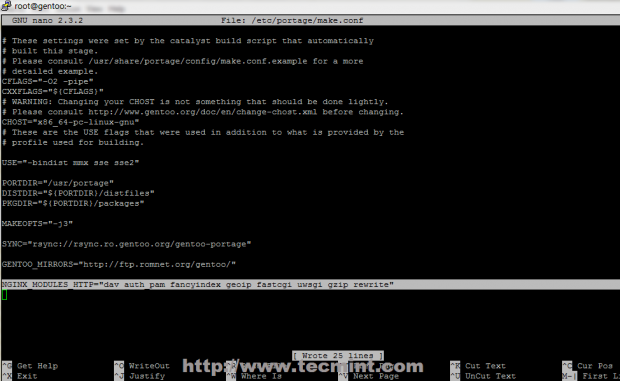
如果除了默认模块之外,您还需要 Nginx 将编译的额外模块(WebDAV、fancyindex、GeoIP 等),请使用NGINX_MODULES_HTTP指令将它们全部附加到 Portage make.conf文件的一行上,然后使用新模块重新编译 Nginx。
# echo 'NGINX_MODULES_HTTP="dav auth_pam fancyindex geoip fastcgi uwsgi gzip rewrite"' >> /etc/portage/make.conf
# emerge --ask nginx
3. Portage 完成 Nginx 的安装后,启动 http 守护进程并通过浏览器访问http://localhost来验证它。

第 2 步:安装 PHP
4.要在 Nginx 服务器上使用 PHP 动态网络编程语言,请通过在 Portage USE 标志上附加fpm和其他重要的 PHP 扩展来安装PHP-FastCGI 进程管理器(FPM),并确保删除 Apache 扩展。
# emerge -pv php

# equery uses php
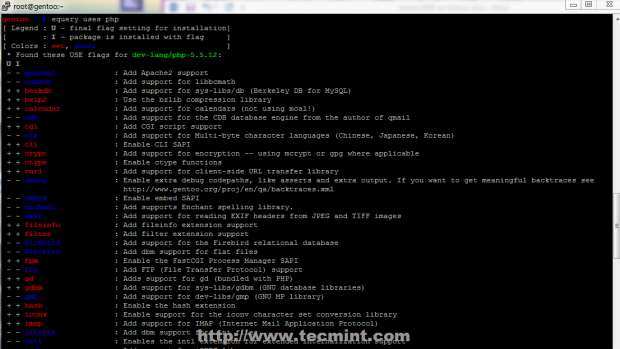
# echo " dev-lang/php fpm cgi curl gd imap mysql mysqli pdo zip json xcache apc zlib zip truetype -apache2 " >> /etc/portage/package.use
# emerge --ask php
5.在启动 PHP-FPM 之前,需要对服务配置文件进行一些更改。打开php-fpm配置文件并进行以下更改。
# nano /etc/php/fpm-php5.5/php-fpm.conf
找到并取消注释以下指令,使其看起来像这样。
error_log = /var/log/php-fpm.log
listen = 127.0.0.1:9000    ## Here you can use any HTTP socket (IP-PORT combination ) you want  ##
pm.start_servers = 20
6.编辑PHP-FPM配置文件后,更改PHP-FPM日志文件权限并启动服务。
# chmod 755 /var/log/php-fpm.log
# /etc/init.d/php-fpm start
即使启动了 PHP-FPM 服务,Nginx 也无法与 PHP 网关通信,因此需要对 Nginx 配置文件进行一些更改。
第 3 步:编辑 Nginx 配置
7. Nginx 默认模板配置文件仅为 localhost 提供基本 HTTP 套接字。要更改此行为并启用虚拟主机,请打开位于/etc/nginx/路径上的nginx.conf文件并进行以下配置。
# nano /etc/nginx/nginx.conf
找到与 localhost 对应并监听127.0.0.1 IP 地址的第一个服务器块,并将其所有语句修改为如下面的屏幕截图所示。
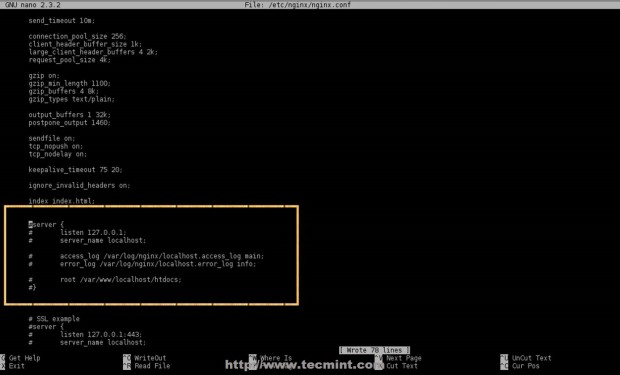
暂时不要关闭文件,移至最底部并在最后一个右花括号“ } “之前添加以下语句。
Include /etc/nginx/sites-enabled/*.conf;

8.接下来为 HTTP 和 HTTPS 协议上的本地主机创建sites-enabled和sites-available(用于未使用的虚拟主机)Nginx 目录和配置文件。
# mkdir /etc/nginx/sites-available
# mkdir /etc/nginx/sites-enabled
为 localhost 创建以下文件配置。
# nano /etc/nginx/sites-available/localhost.conf
添加以下文件内容。
server {
               listen 80;
               server_name localhost;

               access_log /var/log/nginx/localhost_access_log main;
               error_log /var/log/nginx/localhost_error_log info;

               root /var/www/localhost/htdocs;

                location / {
                index index.html index.htm index.php;
                autoindex on;
                autoindex_exact_size off;
                autoindex_localtime on;

                                }

                         location ~ \.php$ {
                       # Test for non-existent scripts or throw a 404 error
                       # Without this line, nginx will blindly send any request ending in .php to php-fpm
                       try_files $uri =404;
                        include /etc/nginx/fastcgi.conf;
                       fastcgi_pass 127.0.0.1:9000;  ## Make sure the socket corresponds with PHP-FPM conf file
                        }
                }

对于具有 SSL 的本地主机,创建以下配置文件。
# nano /etc/nginx/sites-available/localhost-ssl.conf
添加以下文件内容。
server {
               listen 443 ssl;
               server_name localhost;

            ssl on;
               ssl_certificate /etc/ssl/nginx/nginx.pem;
               ssl_certificate_key /etc/ssl/nginx/nginx.key;

               access_log /var/log/nginx/localhost.ssl_access_log main;
               error_log /var/log/nginx/localhost.ssl_error_log info;

               root /var/www/localhost/htdocs;

                                location / {
                index index.html index.htm index.php;
                autoindex on;
                autoindex_exact_size off;
                autoindex_localtime on;
                                 }

                      location ~ \.php$ {
                       # Test for non-existent scripts or throw a 404 error
                       # Without this line, nginx will blindly send any request ending in .php to php-fpm
                       try_files $uri =404;
                       include /etc/nginx/fastcgi.conf;
                       fastcgi_pass 127.0.0.1:9000;
                                }
                }

9.现在是时候在系统可执行路径($PATH shell 变量)上创建两个脚本了,它们充当激活或禁用 Nginx 虚拟主机的命令。
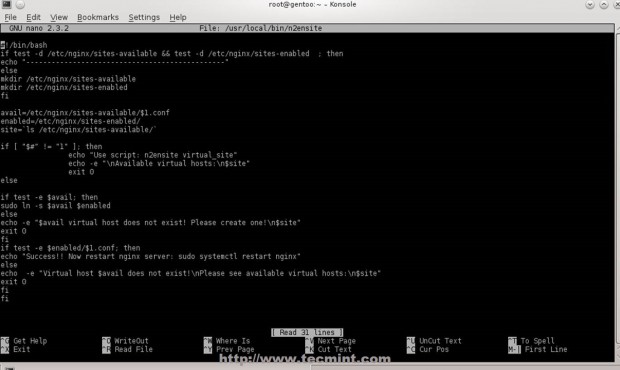
创建名为n2ensite的第一个 Bash 脚本,该脚本将通过在从sites-available到sites-enabled 的指定主机之间创建符号链接来启用虚拟主机配置文件。
# nano /usr/local/bin/n2eniste
添加以下文件内容。
#!/bin/bash
if test -d /etc/nginx/sites-available && test -d /etc/nginx/sites-enabled  ; then
echo "-----------------------------------------------"
else
mkdir /etc/nginx/sites-available
mkdir /etc/nginx/sites-enabled
fi

avail=/etc/nginx/sites-available/$1.conf
enabled=/etc/nginx/sites-enabled/
site=`ls /etc/nginx/sites-available/`

if [ "$#" != "1" ]; then
                echo "Use script: n2ensite virtual_site"
                echo -e "\nAvailable virtual hosts:\n$site"
                exit 0
else

if test -e $avail; then
sudo ln -s $avail $enabled
else
echo -e "$avail virtual host does not exist! Please create one!\n$site"
exit 0
fi

if test -e $enabled/$1.conf; then
echo "Success!! Now restart nginx server: sudo /etc/init.d/ nginx restart"
else
echo  -e "Virtual host $avail does not exist!\nPlease see available virtual hosts:\n$site"
exit 0
fi
fi
10.然后创建第二个名为n2dissite的脚本,该脚本将从启用站点的Nginx 路径中删除指定的活动虚拟主机,内容如下。
# nano /usr/local/bin/n2dissite
添加以下内容。
#!/bin/bash
avail=/etc/nginx/sites-enabled/$1.conf
enabled=/etc/nginx/sites-enabled
site=`ls /etc/nginx/sites-available/`

if [ "$#" != "1" ]; then
                echo "Use script: n2dissite virtual_site"
                echo -e "\nAvailable virtual hosts: \n$site"
                exit 0
else

if test -e $avail; then
sudo rm  $avail
else
echo -e "$avail virtual host does not exist! Exiting!"
exit 0
fi

if test -e $enabled/$1.conf; then
echo "Error!! Could not remove $avail virtual host!"
else
echo  -e "Success! $avail has been removed!\nPlease restart Nginx: sudo /etc/init.d/nginx restart"
exit 0
fi
fi

11.编辑完 Bash 脚本后,附加执行权限并激活 localhost 虚拟主机 - 使用不带.conf扩展名的虚拟主机配置文件名,然后重新启动 Nginx 和 PHP-FPM 服务以应用更改。
# chmod +x /usr/local/bin/n2dissite
# chmod +x /usr/local/bin/n2ensite
# n2ensite localhost
# n2ensite localhost-ssl
# service nginx restart
# service php-fpm restart

12. To test configurations create a PHP info file on localhost default root path for web files (/var/www/localhost/htdocs) and redirect your browser on https://localhost/info.php or http://localhost/info.php.
echo "<?php phpinfo(); ?>" /var/www/localhost/htdocs/info.php
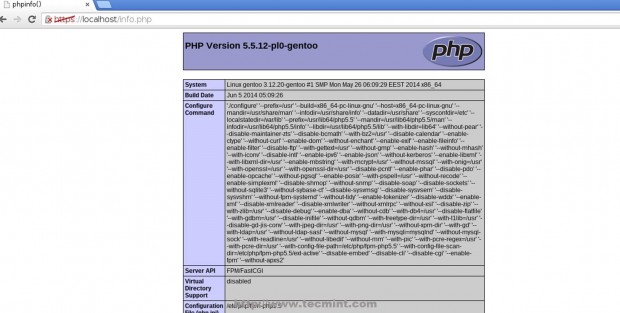
Using localhost Virtual Hosts configuration files as templates and Nginx n2enmod and n2dismod you can easily now add as many websites as you like, but assure that you have valid DNS pointers for an Internet-facing web server or use entries locally on system hosts file.
Step 4: Install MySQL/MariaDB + PhpMyAdmin
To install MySQL database and PhpMyAdmin Web interface for MySQL use the same procedure presented on Installing LAMP on Gentoo.
13. In return if you want to use MariaDB, drop-in replacement for MySQL, use the following commands to get USE flags and install it.
# emerge -pv mariadb
# emerge --ask mariadb

In case you get a package conflict with MySQL add the following lines to Portage package.accept.keywords.
# echo “=dev-db/mariadb-5.5.37-r1 ~amd64” >> /etc/portage/package.accept.keywords
# echo “=virtual/mysql-5.5 ~amd64” >> /etc/portage/package.accept.keywords
# emerge --ask mariadb
14. After MySQL database is installed start service and secure it using mysql_secure_installation (change root password, disable root login outside localhost, remove anonymous user/test database).
# service mysql start
# mysql_secure_installation
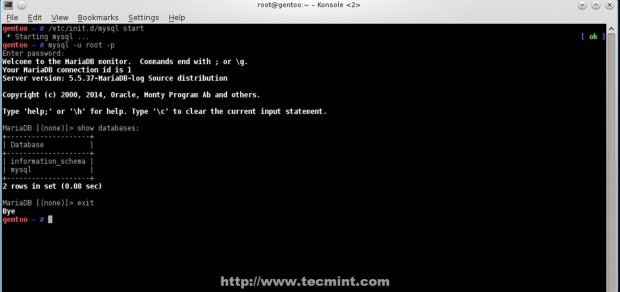
15. Enter MySQL database using, mysql -u root -p command to test its functionality and leave it with exit command.
# mysql -u root -p

MariaDB > show databases;
MariaDB > exit;
16. If you’re not too good with MySQL command line. install PhpMyAdmin Web frontend by executing the following commands.
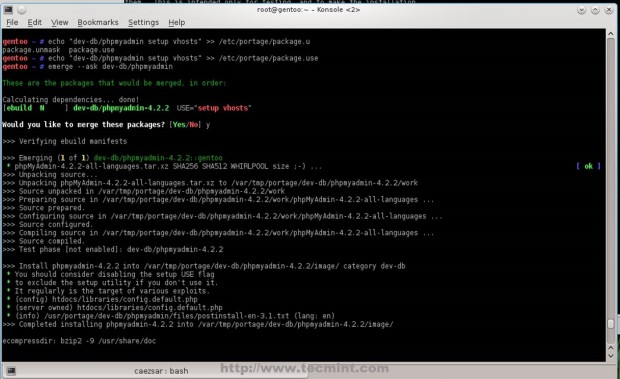
# emerge -pv dev-db/phpmyadmin
# echo “dev-db/phpmyadmin setup vhosts” >> /etc/portage/package.use
# emerge  --ask dev-db/phpmyadmin
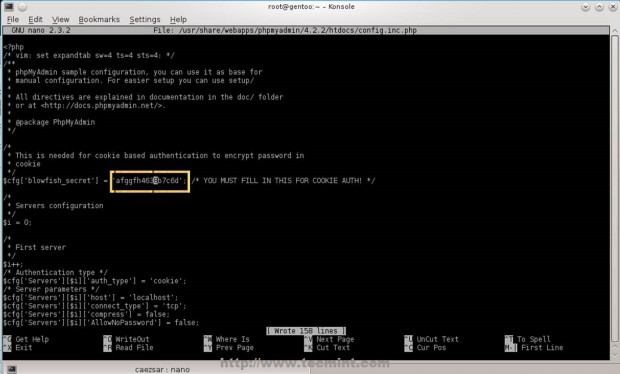
17. After PhpMyAdmin finishes installing, create a configuration file based on sample config file, change blowfish_secret passphrase with a random string, then create a symbolic link from /usr/share/webapps/phpmyadmin/phpmyadmin_version_number/htdocs/ to Virtual Hosts document root path you want to access PhpMyAdmin web interface.
# cd /usr/share/webapps/phpmyadmin/4.2.2/htdocs/
# cp config.sample.inc.php  config.inc.php
# nano config.inc.php
# ln -s /usr/share/webapps/phpmyadmin/4.2.2/htdocs/ /var/www/localhost/htdocs/phpmyadmin

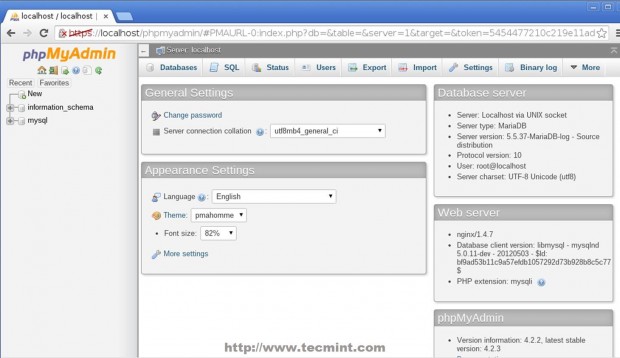
18. To access MySQL database through PhpMyAdmin Web interface, open a browser and use the following URL address https://localhost/phpmyadmin.
19. The final step is to enable services system-wide, to automatically start after reboot.
# rc-update add nginx default
# rc-update add php-fpm default
# rc-update add mysql default

Now we have a minimal environment setup for Web hosting, and if you only use HTML, JavaScript and PHP dynamic generated pages and you don’t need SSL websites, the configuration above should be satisfactory for you.
