在 Arch Linux 中安装 LAMP(Linux、Apache、MySQL/MariaDB 和 PHP/PhpMyAdmin)
Arch Linux 提供了一个灵活的尖端系统环境,并且是一个功能强大的最适合在小型非关键系统上开发 Web 应用程序的解决方案,因为它是一个完全的开源系统,并为服务器和数据库提供了内核和 Web 软件的最新版本。
本教程的主要范围是指导您完成完整的分步说明,最终将引导您安装 Web 开发中最常用的软件组合之一:LAMP(Linux、Apache、MySQL/MariaDB 和 PHP/PhpMyAdmin) ,它将向您展示一些 Arch Linux 系统中不存在的不错的功能(快速而简单的 Bash 脚本),但可以简化创建多个虚拟主机的工作,生成安全HTTS交易所需的SSL 证书和密钥。
要求
- 先前的Arch Linux 安装过程 – 跳过使用 DHCP 的最后一部分。
- 先前在 Arch Linux 上安装 LEMP – 仅配置静态 IP 地址和远程SSH 访问的部分。
步骤1:安装基础软件LAMP
1.在使用静态 IP 地址和SSH进行远程系统访问进行最小系统安装后,使用pacman实用程序升级您的 Arch Linux 系统。
$ sudo pacman -Syu
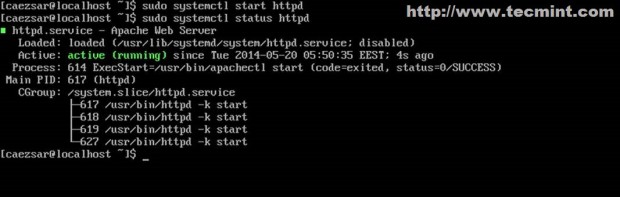
2.升级过程完成后,逐个安装LAMP ,首先安装Apache Web Server并启动/验证每个服务器进程守护程序。
$ sudo pacman -S apache
$ sudo systemctl start httpd
$ sudo systemctl status httpd
3.安装PHP动态服务器端脚本语言及其 Apache 模块。
$ sudo pacman -S php php-apache
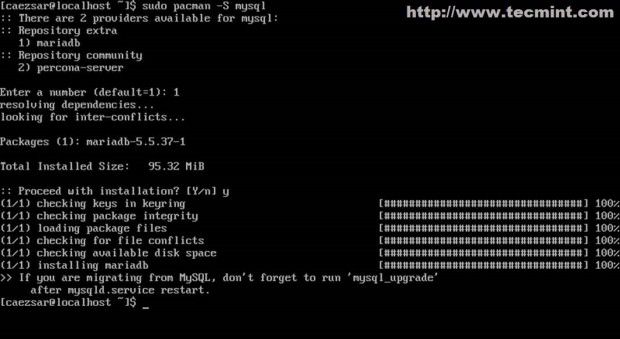
4.最后一步安装MySQL数据库,选择 1(MariaDB)社区数据库分支,然后启动并检查守护进程状态。
$ sudo pacman -S mysql
$ sudo systemctl start mysqld
$ sudo systemctl status mysqld

现在您已经安装了基本的LAMP 软件并且已经使用默认配置启动。
第 2 步:保护 MySQL 数据库
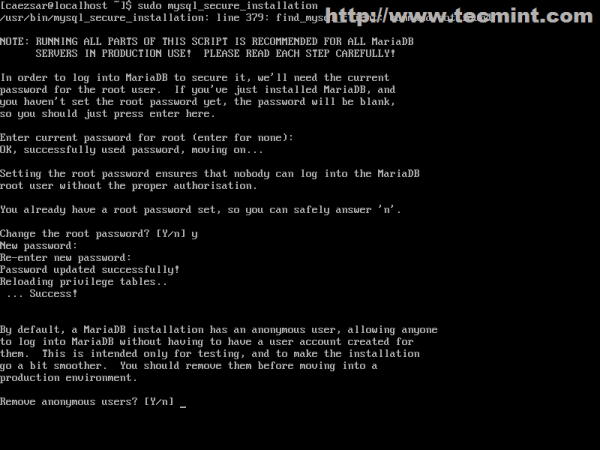
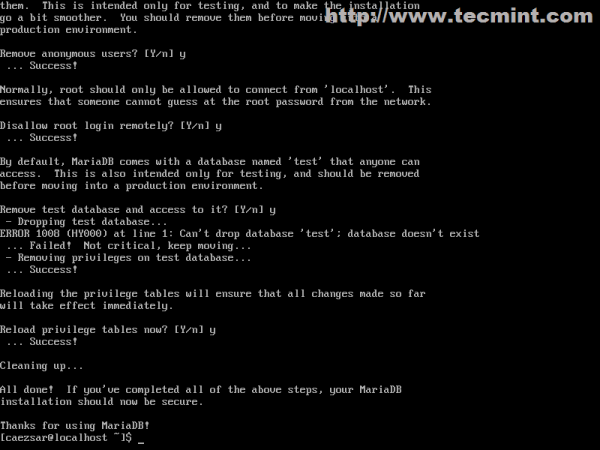
5.下一步是通过为 root 帐户设置密码来保护MySQL数据库,删除匿名用户帐户,删除测试数据库并禁止用户 root 远程登录(按 [ Enter ] 键输入 root 帐户的当前密码,并在所有安全问题上回答“是”)。
$ sudo mysql_secure_installation
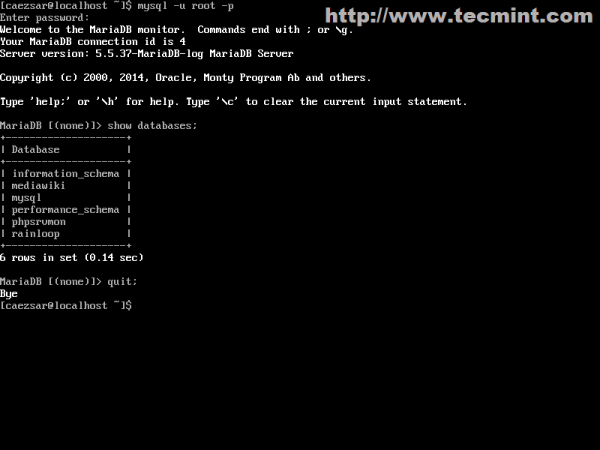
6.通过运行以下命令验证 MySQL 数据库连接,然后使用quit或exit语句离开数据库 shell。
$ mysql -u root -p
第3步:修改Apache主配置文件
7.以下配置大部分与Apache Web 服务器相关,以便使用 PHP 脚本语言、SSL 或非 SSL 虚拟主机提供虚拟主机的动态接口,可以通过修改 httpd 服务文件配置来完成。
首先使用您最喜欢的文本编辑器打开主 Apache 文件配置。
$ sudo nano /etc/httpd/conf/httpd.conf
在文件的最底部,附加以下两行。
IncludeOptional conf/sites-enabled/*.conf
IncludeOptional conf/mods-enabled/*.conf
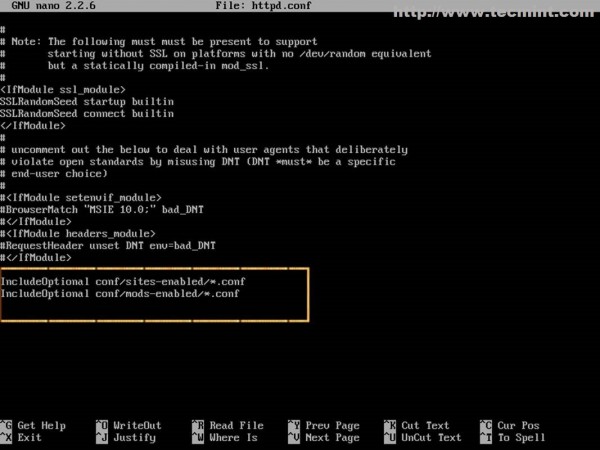
这里的Include语句的作用是告诉 Apache,从现在开始,它应该从/etc/httpd/conf/sites-enabled/(用于虚拟主机)和/etc/httpd/conf/mods-enabled/(用于启用的服务器模块)系统路径中以.conf扩展名结尾的所有文件中读取进一步的配置。
8.在 Apache 收到这两个指令后,发出以下命令创建必要的系统目录。
$ sudo mkdir /etc/httpd/conf/sites-available
$ sudo mkdir /etc/httpd/conf/sites-enabled
$ sudo mkdir /etc/httpd/conf/mods-enabled
sites -available路径包含所有未在 Apache 上激活的虚拟主机配置文件,但下一个 Bash 脚本将使用此目录链接并启用位于那里的网站。
步骤 4:创建 a2eniste 和 a2diste Apache 命令
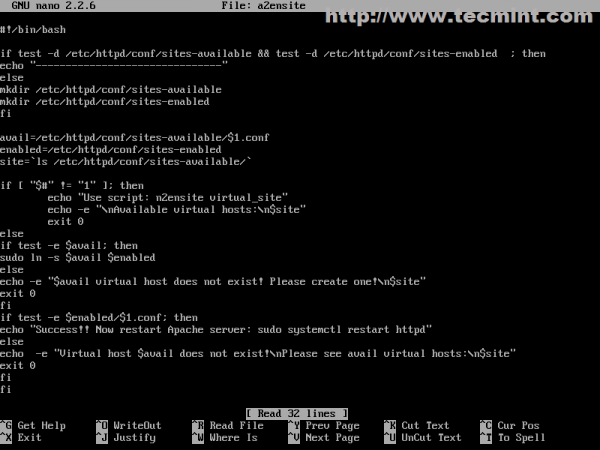
9.现在是时候创建a2ensite和a2dissite Apache 脚本了,它们将作为启用或禁用虚拟主机配置文件的命令。键入cd命令返回到您的$HOME用户路径,然后使用您最喜欢的编辑器创建您的 bash a2eniste和a2dissite脚本。
$ sudo nano a2ensite
在此文件中添加以下内容。
#!/bin/bash
if test -d /etc/httpd/conf/sites-available && test -d /etc/httpd/conf/sites-enabled  ; then
echo "-------------------------------"
else
mkdir /etc/httpd/conf/sites-available
mkdir /etc/httpd/conf/sites-enabled
fi

avail=/etc/httpd/conf/sites-available/$1.conf
enabled=/etc/httpd/conf/sites-enabled
site=`ls /etc/httpd/conf/sites-available/`

if [ "$#" != "1" ]; then
        echo "Use script: n2ensite virtual_site"
        echo -e "\nAvailable virtual hosts:\n$site"
        exit 0
else
if test -e $avail; then
sudo ln -s $avail $enabled
else
echo -e "$avail virtual host does not exist! Please create one!\n$site"
exit 0
fi
if test -e $enabled/$1.conf; then
echo "Success!! Now restart Apache server: sudo systemctl restart httpd"
else
echo  -e "Virtual host $avail does not exist!\nPlease see avail virtual hosts:\n$site"
exit 0
fi
fi
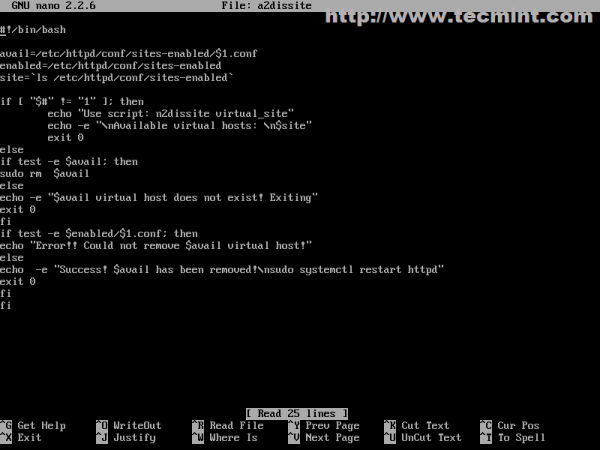
现在创建 a2dissite bash 脚本文件。
$ sudo nano a2dissite
附加以下内容。
#!/bin/bash
avail=/etc/httpd/conf/sites-enabled/$1.conf
enabled=/etc/httpd/conf/sites-enabled
site=`ls /etc/httpd/conf/sites-enabled`

if [ "$#" != "1" ]; then
        echo "Use script: n2dissite virtual_site"
        echo -e "\nAvailable virtual hosts: \n$site"
        exit 0
else
if test -e $avail; then
sudo rm  $avail
else
echo -e "$avail virtual host does not exist! Exiting"
exit 0
fi
if test -e $enabled/$1.conf; then
echo "Error!! Could not remove $avail virtual host!"
else
echo  -e "Success! $avail has been removed!\nsudo systemctl restart httpd"
exit 0
fi
fi
10.创建文件后,分配执行权限并将其复制到$PATH可执行目录,以使它们在整个系统内可用。
$ sudo chmod +x a2ensite a2dissite
$ sudo cp a2ensite a2dissite /usr/local/bin/

第 5 步:在 Apache 中创建虚拟主机
11. Arch Linux 上 Apache Web 服务器的虚拟主机默认配置文件由位于/etc/httpd/conf/extra/路径中的httpd-vhosts.conf文件提供,但如果您的系统使用大量虚拟主机,则很难跟踪哪些网站已激活或未激活。如果您想禁用某个网站,您必须注释或删除其所有指令,如果您的系统提供大量网站并且您的网站有更多配置指令,那么这可能是一项艰巨的任务。
使用sites-available和sites-enabled路径,大大简化了启用或禁用网站的工作,并且还保留了所有网站配置文件,无论它们是否已激活。
下一步,我们将构建第一个虚拟主机,该主机指向默认的 localhost,并使用默认的DocumentRoot路径来为网站文件提供服务(/srv/http)。
$ sudo nano /etc/httpd/conf/sites-available/localhost.conf
在此处添加以下 Apache 指令。
<VirtualHost *:80>
        DocumentRoot "/srv/http"
        ServerName localhost
        ServerAdmin you@example.com
        ErrorLog "/var/log/httpd/localhost-error_log"
        TransferLog "/var/log/httpd/localhost-access_log"

<Directory />
    Options +Indexes +FollowSymLinks +ExecCGI
    AllowOverride All
    Order deny,allow
    Allow from all
Require all granted
</Directory>

</VirtualHost>
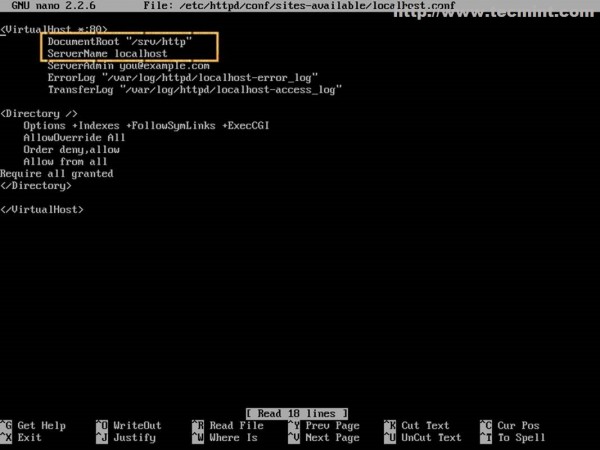
这里最重要的语句是Port和ServerName指令,它们指示 Apache 在端口80上打开网络连接并将所有具有本地主机名的查询重定向到位于/srv/http/路径中的文件。
12.创建 localhost 文件后,激活它,然后重新启动 httpd 守护程序以查看更改。
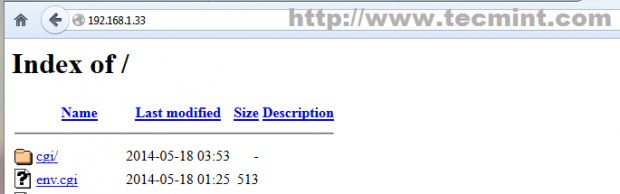
$ sudo a2ensite localhost
$ sudo systemctl restart httpd

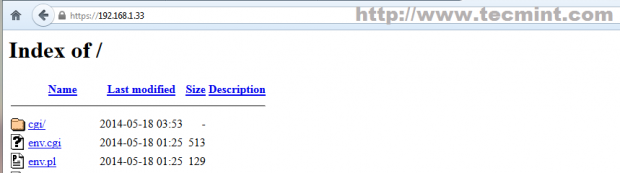
13.然后将您的浏览器指向http://localhost(如果您从 Arch 系统运行)或http://Arch_IP (如果您使用远程系统)。
第 6 步:在 LAMP 上使用虚拟主机启用 SSL
SSL(安全套接字层)是一种用于加密网络或互联网上的 HTTP 连接的协议,它使得数据流使用对称/非对称加密密钥通过安全通道传输,并由 Arch Linux 中的OpenSSL包提供。
14.默认情况下,Arch Linux 中的 Apache 未启用 SSL 模块,可以通过从主httpd.conf配置文件中取消注释mod_ssl.so模块并包含位于额外 httpd 路径中的httpd-ssl.conf文件来激活。
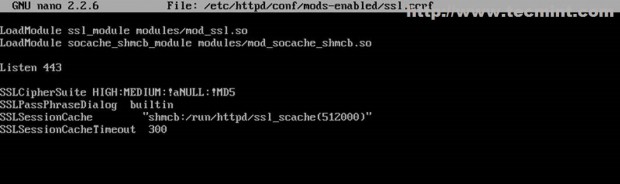
但为了简化操作,我们将在mods-enabled路径中为 SSL 创建一个新模块文件,并保持主 Apache 配置文件不变。为 SSL 模块创建以下文件并添加以下内容。
$ sudo nano /etc/httpd/conf/mods-enabled/ssl.conf
附加以下内容。
LoadModule ssl_module modules/mod_ssl.so
LoadModule socache_shmcb_module modules/mod_socache_shmcb.so

Listen 443

SSLCipherSuite HIGH:MEDIUM:!aNULL:!MD5
SSLPassPhraseDialog  builtin
SSLSessionCache        "shmcb:/run/httpd/ssl_scache(512000)"
SSLSessionCacheTimeout  300
15.现在创建一个虚拟主机文件,该文件指向相同的本地主机名,但这次使用 SSL 服务器配置,并稍微更改其名称以提醒您它代表带有 SSL 的本地主机。
$ sudo nano /etc/httpd/conf/sites-available/localhost-ssl.conf
在此文件中添加以下内容。
<VirtualHost *:443>
        DocumentRoot "/srv/http"
        ServerName localhost
        ServerAdmin you@example.com
        ErrorLog "/var/log/httpd/localhost-ssl-error_log"
        TransferLog "/var/log/httpd/localhost-ssl-access_log"

SSLEngine on

SSLCertificateFile "/etc/httpd/conf/ssl/localhost.crt"
SSLCertificateKeyFile "/etc/httpd/conf/ssl/localhost.key"

<FilesMatch "\.(cgi|shtml|phtml|php)$">
    SSLOptions +StdEnvVars
</FilesMatch>

<Directory "/srv/http/cgi-bin">
    SSLOptions +StdEnvVars
</Directory>

BrowserMatch "MSIE [2-5]" \
         nokeepalive ssl-unclean-shutdown \
         downgrade-1.0 force-response-1.0

CustomLog "/var/log/httpd/ssl_request_log" \
          "%t %h %{SSL_PROTOCOL}x %{SSL_CIPHER}x \"%r\" %b"

<Directory />

    Options +Indexes +FollowSymLinks +ExecCGI
    AllowOverride All
    Order deny,allow
    Allow from all
Require all granted
</Directory>

</VirtualHost>
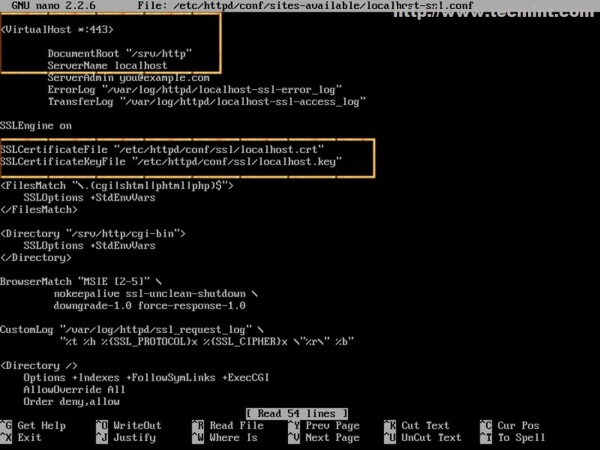
除了Port和ServerName指令之外,这里的其他重要指令是指向尚未创建的SSL 证书文件和SSL 密钥文件的指令,因此请不要重新启动 Apache Web 服务器,否则您会收到一些错误。
16.要创建所需的 SSL 证书文件和密钥,请安装OpenSSL包,并发出以下命令。
$ sudo pacman -S openssl
17.然后创建以下Bash脚本,该脚本会自动创建并将所有Apache 证书和密钥存储在/etc/httpd/conf/ssl/系统路径中。
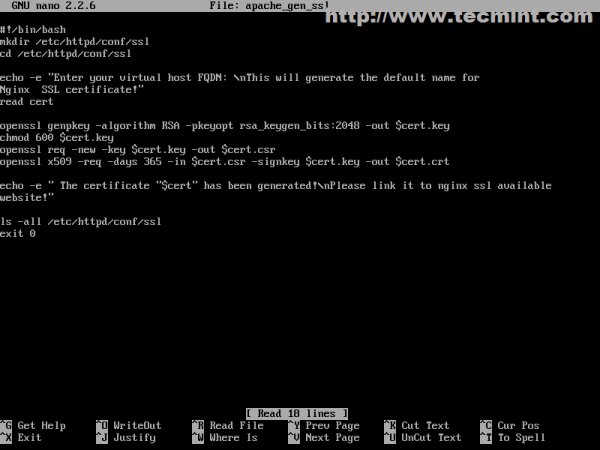
$ sudo nano apache_gen_ssl
添加以下文件内容然后保存并使其可执行。
#!/bin/bash
mkdir /etc/httpd/conf/ssl
cd /etc/httpd/conf/ssl

echo -e "Enter your virtual host FQDN: \nThis will generate the default name for Nginx  SSL certificate!"
read cert

openssl genpkey -algorithm RSA -pkeyopt rsa_keygen_bits:2048 -out $cert.key
chmod 600 $cert.key
openssl req -new -key $cert.key -out $cert.csr
openssl x509 -req -days 365 -in $cert.csr -signkey $cert.key -out $cert.crt

echo -e " The certificate "$cert" has been generated!\nPlease link it to Apache SSL available website!"

ls -all /etc/httpd/conf/ssl
exit 0
$ sudo chmod +x apache_gen_ssl
如果您希望脚本在系统范围内可用,请将其复制到可执行文件$PATH。
$ sudo cp /apache_gen_ssl /usr/local/bin/
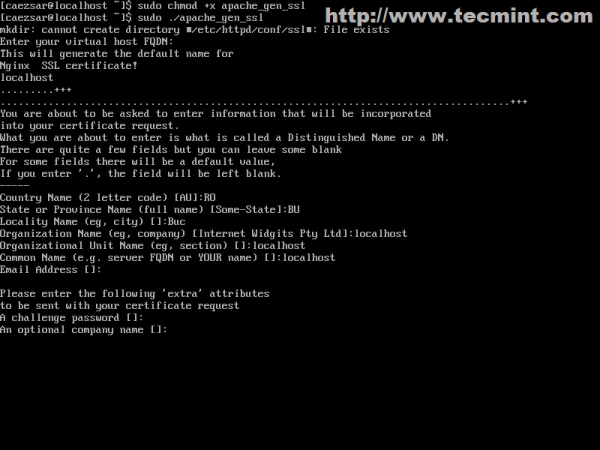
18.现在通过运行脚本生成您的证书和密钥。提供您的 SSL 选项,并不要忘记证书名称和通用名称以匹配您的官方域名(FQDN)。
$ sudo ./apache_gen_ssl
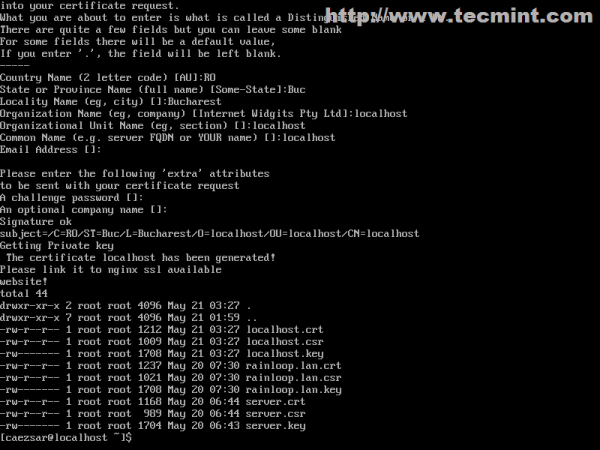
创建证书和密钥后,不要忘记修改 SSL 虚拟主机证书和密钥配置以匹配此证书的名称。
19.最后一步是激活新的 SSL 虚拟主机并重新启动服务器以应用配置。
$ sudo a2ensite localhost-ssl
$ sudo systemctl restart httpd

就这样!要验证它,请打开浏览器并使用 HTTPS 协议在 URL 上添加 Arch IP:https://localhost或https://system_IP。
步骤7:在Apache上启用PHP
20.默认情况下,Apache 仅在 Arch Linux 中提供 HTML 静态文件内容,不支持动态脚本语言。要激活 PHP,首先打开 Apache 主配置文件,然后搜索并取消注释以下LoadModule语句(php-apache在 Arch Linux 中不适用于mod_mpm_event)。
$ sudo nano /etc/httpd/conf/httpd.conf
使用[Ctrl]+[w]搜索并注释以下行,使其看起来像这样。
#LoadModule mpm_event_module modules/mod_mpm_event.so

21.然后在mods-enabled路径中为 PHP 模块创建一个新文件,内容如下。
$ sudo nano /etc/httpd/conf/mods-enabled/php.conf
添加以下内容(必须使用mod_mpm_prefork)。
LoadModule mpm_prefork_module modules/mod_mpm_prefork.so
LoadModule php5_module modules/libphp5.so

Include conf/extra/php5_module.conf

22. To verify setting create PHP a file named info.php in your DocumnetRoot (/srv/http/), then restart Apache and point your browser to info.php file: https://localhost/info.php.
<?php

phpinfo();

?>
$ sudo systemctl restart httpd

That’s it! If everything looks like image above, you now have PHP dynamic server-side scripting language enabled on Apache and you can now develop websites using Open Source CMS like WordPress for example.
If you want to verify Apache syntax configurations and see a list of loaded modules without restarting httpd daemon run the following commands.
$ sudo apachectl configtest
$ sudo apachectl -M
Step 8: Install and Configuring PhpMyAdmin
23. If you don’t master MySQL command line and want a simple remote access to MySQL database provided through web interface then you need PhpMyAdmin package installed on your Arch box.
$ sudo pacman -S phpmyadmin php-mcrypt
24. After the packages had been installed you need to enable some PHP extensions (mysqli.so, mcrypt.so – for internal authentication) and you can, also, enable other modules for needed for future CMS platforms like openssl.so, imap.so or iconv.so etc.
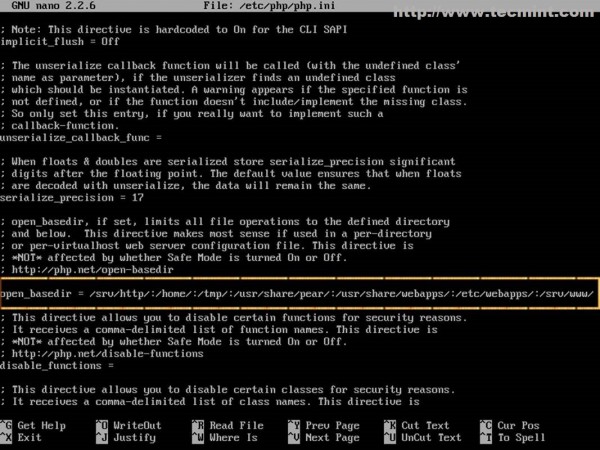
$ sudo nano /etc/php/php.ini
Locate and uncomment the above extensions.
extension=mcrypt.so
extension=mssql.so
extension=mysqli.so
extension=openssl.so
extension=iconv.so
extension=imap.so
extension=zip.so
extension=bz2.so

Also, on same file, search and locate open_basedir statement and add PhpMyAdmin system path (/etc/webapps/ and /usr/share/webapps/) to make sure PHP can access and read files under those directories (If you, also, change Virtual Hosts DocumentRoot path from /srv/http/ to another location you need to append the new path here too).
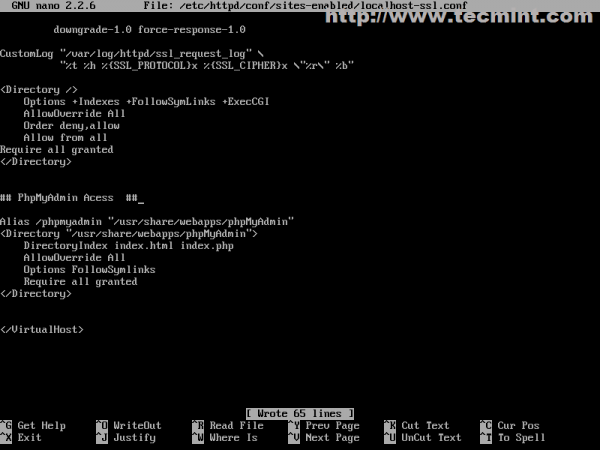
25. The last thing you need to do in order to access PhpMyAdmin Web Interface is to add PhpMyAdmin Apache statements on Virtual Hosts. As a security measure will make sure that PhpMyAdmin Web Interface can be accessible only from localhost ( or system IP address) using HTTPS protocol and not from other different Virtual Hosts. So, open your localhost-ssl.conf Apache file and at the bottom, before last statement add the following content.
$ sudo nano /etc/httpd/conf/sites-enabled/localhost-ssl.conf
Alias /phpmyadmin "/usr/share/webapps/phpMyAdmin"

<Directory "/usr/share/webapps/phpMyAdmin">
    DirectoryIndex index.html index.php
    AllowOverride All
    Options FollowSymlinks
    Require all granted
</Directory>
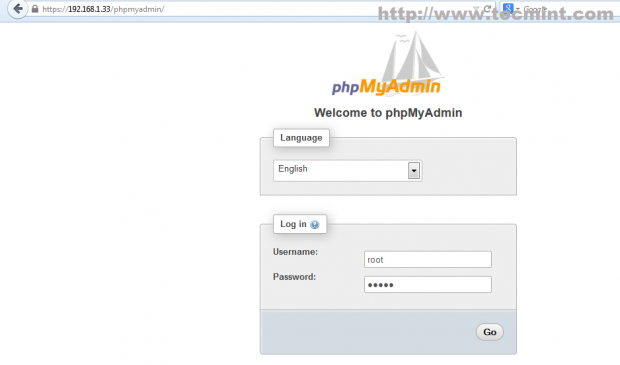
26. Afterwards restart Apache daemon and point your browser to the following address and you should be able to access your PhpMyAdmin Web Interface: https://localhost/phpmyadmin or https://system_IP/phpmyadmin.
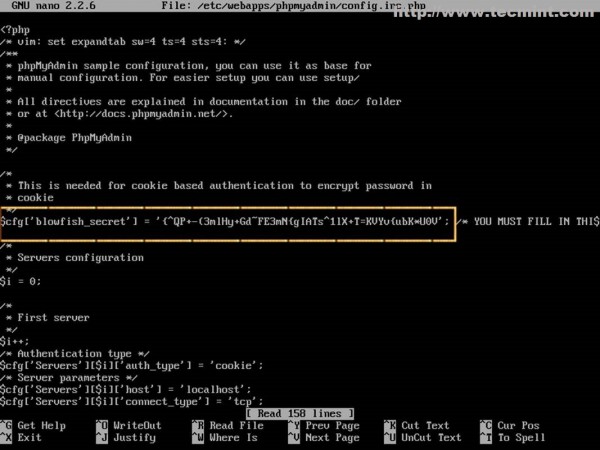
27. If, after you login to PhpMyAdmin, you see a bottom error concerning a blowfish_secret, open and edit /etc/webapps/phpmyadmin/config.inc.php file and insert a random string like the one in the following statement, then refresh page.
$cfg['blowfish_secret'] = ‘{^QP+-(3mlHy+Gd~FE3mN{gIATs^1lX+T=KVYv{ubK*U0V’ ;
Step 9: Enable LAMP System Wide
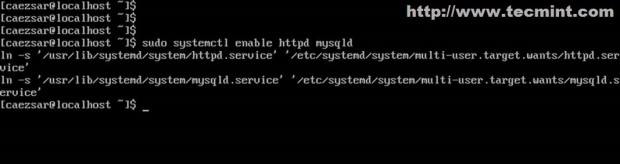
28. If you want LAMP stack to be automatically started after system reboot run the following commands.
$ sudo systemctl enable httpd mysqld
This are some of main configuration settings on LAMP needed to transform an Arch Linux system into a simple but powerful, fast and robust web platform with cutting-age server software for small non-critical environments, but if you get stubborn and still want to use it in a large production environment you should arm yourself with plenty of patience and pay an extra attention on packages updates and make regular system backup images for a fast system restoring in case of system failures.