
如何在 Ubuntu Server 22.04 中安装 Fork CMS
Fork 是一个适合初学者和专业人士的开源内容管理系统。它旨在创建一个用户友好的环境来构建、监控和更新您的网站。它主要作为 CMS 推出,提供博客、页面和用户等额外模块。其强大的应用程序和主题可帮助您根据需要自定义您的网站。它具有用户友好的用户界面,可帮助用户快速轻松地创建网站。
本教程将向您展示如何在 Ubuntu 22.04 上使用 Apache 和 Let's Encrypt SSL 安装 Fork CMS。
先决条件
- 运行 Ubuntu 22.04 的服务器。
- 有效域名指向您的服务器 IP。
- 服务器上配置了 root 密码。
安装 Apache、MariaDB 和 PHP
首先,使用以下命令安装 Apache Web 服务器和 MariaDB 服务器:
apt-get install apache2 mariadb-server -y接下来,您需要在服务器上安装 PHP 7.4 版和其他扩展。但是,PHP 7.4 版本不包含在 Ubuntu 默认存储库中。因此,您需要将 Ondrej PHP 存储库添加到您的服务器。您可以使用以下命令添加它:
apt install software-properties-common
add-apt-repository ppa:ondrej/php -y
添加 PHP 存储库后,您可以使用以下命令安装 PHP 以及其他所需的扩展:
apt-get install php7.4 libapache2-mod-php7.4 php7.4-xml php7.4-cli php7.4-zip php7.4-common php7.4-sqlite3 php7.4-curl php7.4-intl php7.4-mbstring php7.4-xmlrpc php7.4-mysql php7.4-gd wget unzip -y安装所有这些包后,编辑 PHP 配置文件并更改默认设置:
nano /etc/php/7.4/apache2/php.ini根据您的需要更改以下设置:
memory_limit = 256M
upload_max_filesize = 100M
max_execution_time = 360
file_uploads = On
date.timezone = UTC
保存并关闭文件,然后重新启动 Apache 服务以应用配置更改:
systemctl restart apache2创建 Fork CMS 数据库
首先,您需要保护 MariaDB 并设置 MariaDB root 密码。您可以运行以下脚本来保护 MariaDB 安装:
mysql_secure_installation该脚本将设置 root 密码、删除匿名用户、禁止 root 远程登录并删除测试数据库,如下所示:
Set root password? [Y/n] n
Remove anonymous users? [Y/n] y
Disallow root login remotely? [Y/n] y
Remove test database and access to it? [Y/n] y
Reload privilege tables now? [Y/n] y
Once MariaDB is secured, log in to MariaDB shell:
接下来,使用以下命令登录 MariaDB shell:
mysql -u root -p输入您的 root 密码,然后为 Fork CMS 创建数据库和用户:
MariaDB [(none)]> CREATE DATABASE forkdb;
MariaDB [(none)]> CREATE USER 'forkuser'@'localhost' IDENTIFIED BY 'password';
接下来,使用以下命令向 Fork CMS 数据库授予权限:
MariaDB [(none)]> GRANT ALL PRIVILEGES ON forkdb.* TO 'forkuser'@'localhost';接下来,运行 FLUSH PRIVILEGES 命令,以便 MariaDB 重新加载权限表:
MariaDB [(none)]> FLUSH PRIVILEGES;最后,使用以下命令退出 MariaDB shell:
MariaDB [(none)]> EXIT;安装 Fork CMS
首先,您需要将 Composer 安装到您的系统中。您可以使用以下命令安装它:
curl -sS https://getcomposer.org/installer | php -- --install-dir=/usr/local/bin --filename=composer您将得到以下输出:
All settings correct for using Composer
Downloading...

Composer (version 2.4.4) successfully installed to: /usr/local/bin/composer
Use it: php /usr/local/bin/composer
接下来,导航到 Apache Web 根目录并使用 Composer 下载 Fork CMS:
cd /var/www/html/
composer create-project forkcms/forkcms
接下来,为 FORk CMS 目录设置适当的权限和所有权:
chown -R www-data:www-data /var/www/html/forkcms
chmod -R 775 /var/www/html/forkcms
完成后,您可以继续下一步。
为 Fork CMS 创建 Apache 虚拟主机
接下来,您需要创建一个 Apache 虚拟主机配置文件以通过互联网为 Fork CMS 提供服务。您可以使用以下命令创建它:
nano /etc/apache2/sites-available/forkcms.conf添加以下行:
<VirtualHost *:80>
     ServerAdmin [email
     DocumentRoot /var/www/html/forkcms
     ServerName forkcms.example.com

     <Directory /var/www/html/forkcms/>
          Options FollowSymlinks
          AllowOverride All
          Require all granted
     </Directory>

     ErrorLog ${APACHE_LOG_DIR}/error.log
     CustomLog ${APACHE_LOG_DIR}/access.log combined

</VirtualHost>
保存并关闭文件,然后使用以下命令激活 Fork CMS 并启用 Apache 重写模块:
a2ensite forkcms.conf
a2enmod rewrite
接下来,重新启动 Apache 服务以应用更改:
systemctl restart apache2您还可以使用以下命令检查 Apache 服务状态:
systemctl status apache2您将得到以下输出:
? apache2.service - The Apache HTTP Server
     Loaded: loaded (/lib/systemd/system/apache2.service; enabled; vendor preset: enabled)
     Active: active (running) since Tue 2022-12-13 05:35:24 UTC; 1s ago
       Docs: https://httpd.apache.org/docs/2.4/
    Process: 94668 ExecStart=/usr/sbin/apachectl start (code=exited, status=0/SUCCESS)
   Main PID: 94672 (apache2)
      Tasks: 6 (limit: 2238)
     Memory: 13.4M
        CPU: 45ms
     CGroup: /system.slice/apache2.service
             ??94672 /usr/sbin/apache2 -k start
             ??94673 /usr/sbin/apache2 -k start
             ??94674 /usr/sbin/apache2 -k start
             ??94675 /usr/sbin/apache2 -k start
             ??94676 /usr/sbin/apache2 -k start
             ??94677 /usr/sbin/apache2 -k start

Dec 13 05:35:24 ubuntu2204 systemd[1]: apache2.service: Deactivated successfully.
Dec 13 05:35:24 ubuntu2204 systemd[1]: Stopped The Apache HTTP Server.
Dec 13 05:35:24 ubuntu2204 systemd[1]: Starting The Apache HTTP Server...
完成后,您可以继续下一步。
访问 Fork CMS Web 界面
现在,打开网络浏览器并输入 URL http://forkcms.example.com/install/2。 您将被重定向到以下页面:
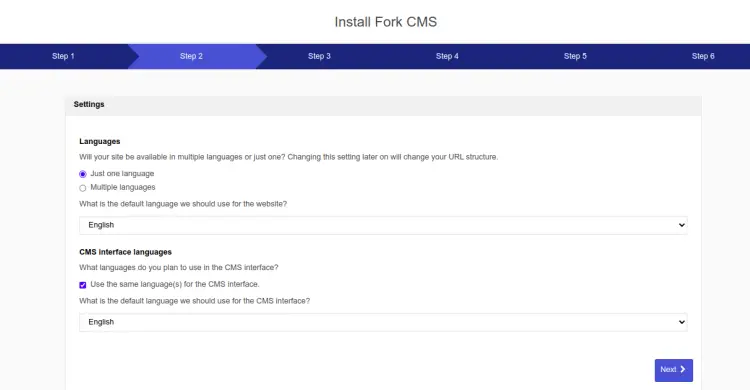
在这里,选择您想要的语言,然后单击下一步按钮。您应该看到以下页面:
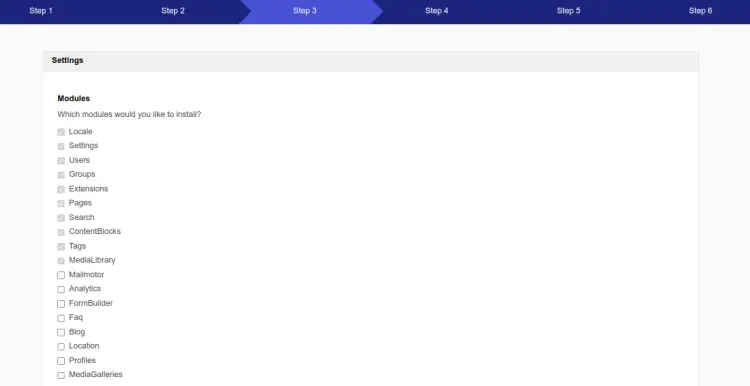
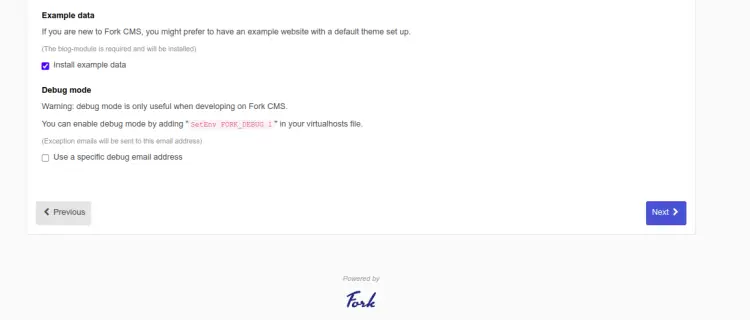
在这里,选择您要安装的模块,然后单击下一步按钮。您应该看到以下页面:
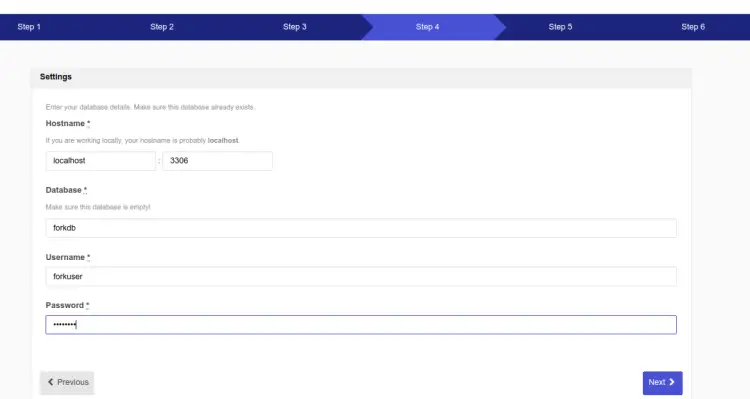
在这里,提供您的数据库详细信息,然后单击下一步按钮。您应该看到以下页面:
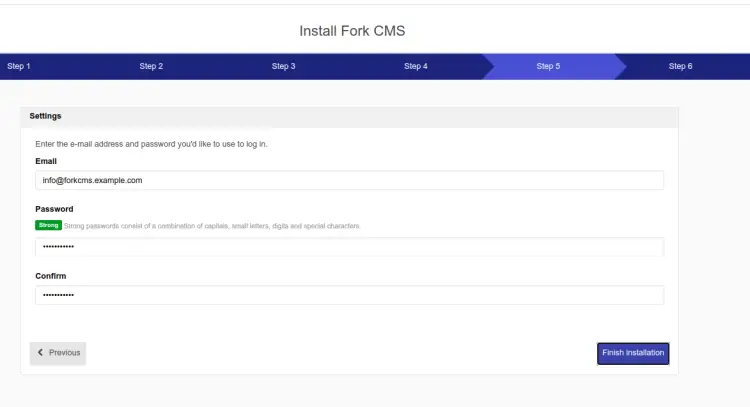
在这里,提供您的管理员电子邮件地址、用户名和密码,然后单击完成安装按钮。您应该看到以下页面:
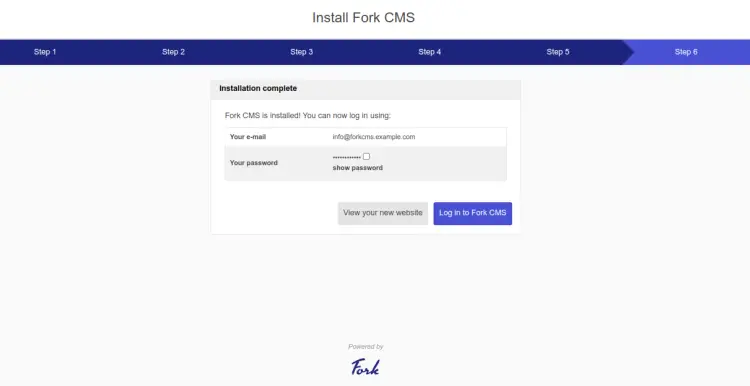
现在,单击登录 Fork CMS 按钮。您应该在以下页面上看到 Fork CMS 登录屏幕:
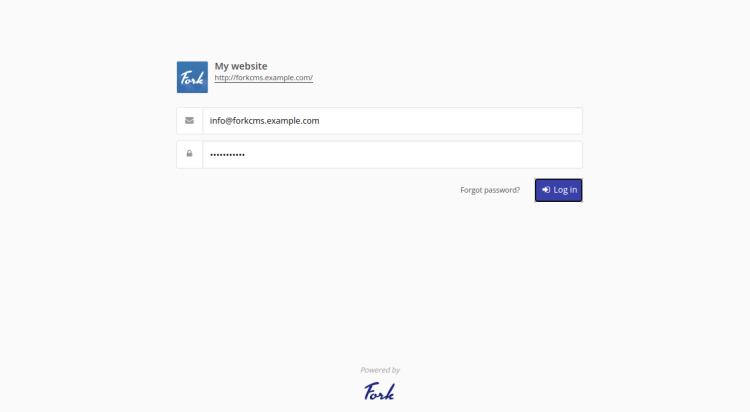
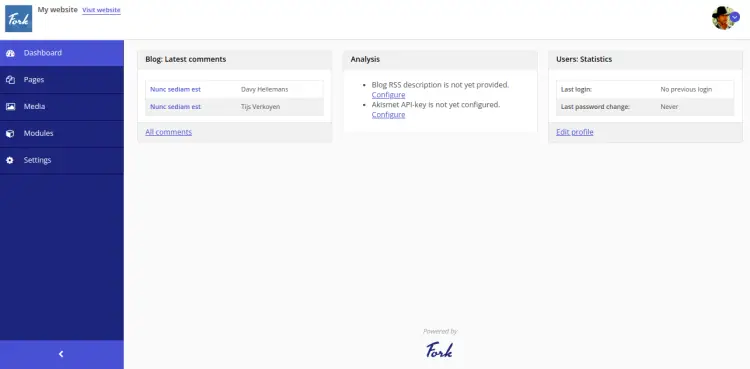
现在,提供您的管理员用户名和密码,然后单击登录按钮。您将被重定向到 Fork CMS 仪表板,如下图所示:
使用 Let's Encrypt SSL 保护 ForkCMS
要在 ForkCMS 网站上安装 Let's Encrypt SSL,您需要在服务器上安装 certbot 软件包。
首先,使用以下命令安装 Snap 包管理器:
apt install snapd接下来,将 Snap 包更新到最新版本:
snap install core
snap refresh core
接下来,使用以下命令安装 certbot 包:
snap install --classic certbot接下来,为 Certbot 二进制文件创建到系统位置的符号链接:
ln -s /snap/bin/certbot /usr/bin/certbot接下来,运行以下命令下载并安装 Let's Encrypt SSL 证书:
certbot --apache -d forkcms.example.com您将被要求提供您的电子邮件地址并接受服务条款:
Saving debug log to /var/log/letsencrypt/letsencrypt.log
Enter email address (used for urgent renewal and security notices)
 (Enter 'c' to cancel): [email

- - - - - - - - - - - - - - - - - - - - - - - - - - - - - - - - - - - - - - - -
Please read the Terms of Service at
https://letsencrypt.org/documents/LE-SA-v1.3-September-21-2022.pdf. You must
agree in order to register with the ACME server. Do you agree?
- - - - - - - - - - - - - - - - - - - - - - - - - - - - - - - - - - - - - - - -
(Y)es/(N)o: Y

- - - - - - - - - - - - - - - - - - - - - - - - - - - - - - - - - - - - - - - -
Would you be willing, once your first certificate is successfully issued, to
share your email address with the Electronic Frontier Foundation, a founding
partner of the Let's Encrypt project and the non-profit organization that
develops Certbot? We'd like to send you email about our work encrypting the web,
EFF news, campaigns, and ways to support digital freedom.
- - - - - - - - - - - - - - - - - - - - - - - - - - - - - - - - - - - - - - - -
(Y)es/(N)o: Y
键入 Y 并按 Enter 键来下载并安装您的域的 SSL 证书:
Account registered.
Requesting a certificate for forkcms.example.com

Successfully received certificate.
Certificate is saved at: /etc/letsencrypt/live/forkcms.example.com/fullchain.pem
Key is saved at:         /etc/letsencrypt/live/forkcms.example.com/privkey.pem
This certificate expires on 2023-02-28.
These files will be updated when the certificate renews.
Certbot has set up a scheduled task to automatically renew this certificate in the background.

Deploying certificate
Successfully deployed certificate for forkcms.example.com to /etc/nginx/conf.d/mastodon.conf
Congratulations! You have successfully enabled HTTPS on https://forkcms.example.com

- - - - - - - - - - - - - - - - - - - - - - - - - - - - - - - - - - - - - - - -
If you like Certbot, please consider supporting our work by:
 * Donating to ISRG / Let's Encrypt:   https://letsencrypt.org/donate
 * Donating to EFF:                    https://eff.org/donate-le
- - - - - - - - - - - - - - - - - - - - - - - - - - - - - - - - - - - - - - - -
结论
在这篇文章中,我们解释了如何在 Ubuntu 22.04 服务器上使用 Apache 安装 Fork CMS 和 Let's Encrypt SSL。您现在可以通过 Fork CMS 直观的 Web 界面构建、监控和更新您的网站。如果您有任何疑问,请随时问我。