创建多启动 Linux 桌面系统
我总是对尝试不同 Linux 发行版的最新版本并享受它们所提供的功能充满好奇。然而,我不能损害我的主要工作站。我也不能为了尝试新版本而不断地从头开始设置环境。在虚拟机中尝试新发行版并不能提供丰富的用户体验。
如果我可以在不做出任何妥协的情况下在同一台机器上使用多个发行版,那会怎样?解决方案是设置多启动系统,在启动时,我可以选择我想要的选项。本文将教您如何设置多启动 Linux 系统。
要开始此过程,您需要某种在系统上使用不同发行版而不损害现有操作系统 (OS) 的方法。可启动 USB 驱动器满足独立于本地安装的操作系统启动系统的要求。我选择使用的工具是 Ventoy,这是一种简单、轻量且非常高效的开源工具,用于创建可启动 USB 驱动器。简而言之,我可以创建一个可启动驱动器,然后将文件复制到其中。
使用 Ventoy,我可以随时添加/复制/删除任意数量的文件,就像普通驱动器一样。它使用 GRUB(GRand Unified Bootloader)作为启动管理器,并允许您直接从 ISO 映像启动。您可以在可启动 USB 驱动器上存储其他文件,而不会影响可启动 ISO 映像的功能。文件可以通过 USB 上的文件夹分隔。Ventoy 扫描所有目录和子目录并显示驱动器上存在的所有 ISO 映像。
要求:
- USB 驱动器
- 文件
- 空磁盘、空分区或可用磁盘空间
[您可能还喜欢: 优化 Red Hat Enterprise Linux 安装 ISO 映像]
让我们看看它是如何工作的
将 USB 驱动器连接到您的系统并正确识别其名称。
注意:建议断开所有未使用的其他外部驱动器,以避免混淆。
打开终端并输入:
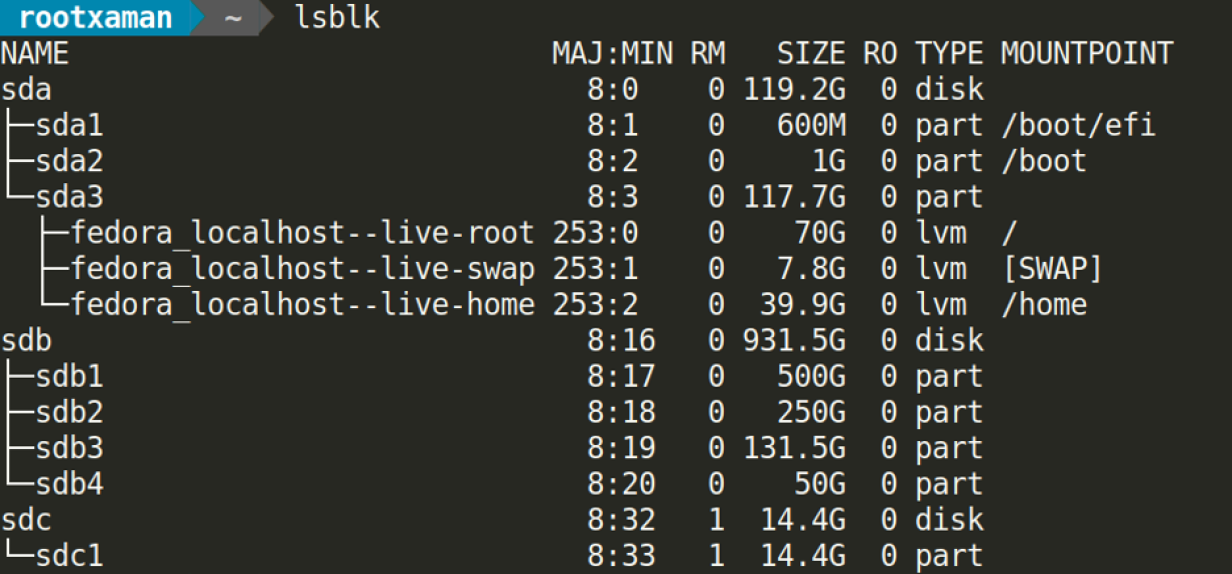
# lsblklsblk列出我的系统上可用的所有块设备。

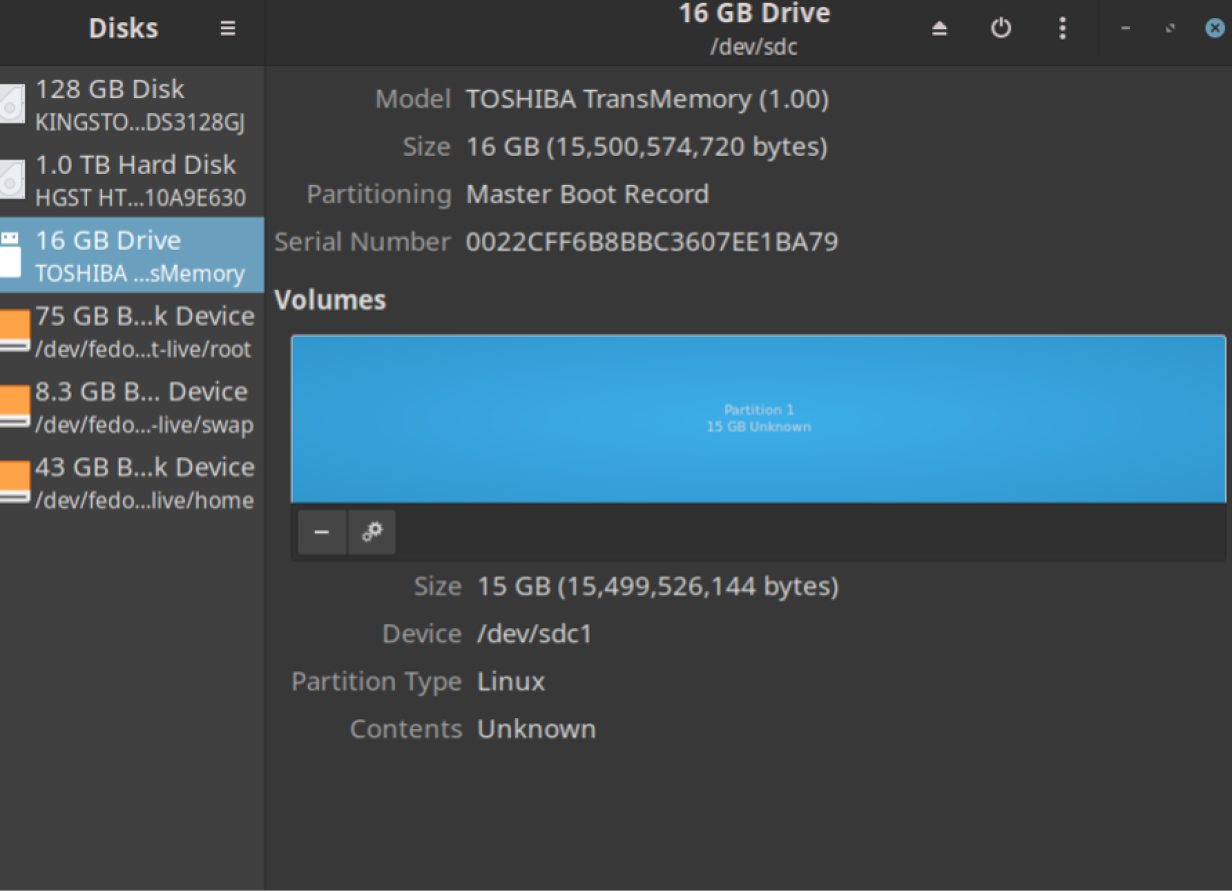
就我而言,USB 被安装为sdc,并且sdc1是 USB 的第一个也是唯一的分区。

在继续操作之前,请务必备份驱动器中的所有数据。
下载Ventoy 的最新稳定版本。
导航到本地下载位置:
# cd <path to zip file>接下来解压缩文件:
tar -zxvf <name of the zip file>导航到解压的 Ventoy 文件夹:
# cd <folder name>将 Ventoy 安装到 USB 驱动器,这需要 root 用户权限。
注意:请正确指定驱动器名称,因为它将格式化整个驱动器。
sudo sh Ventoy2Disk.sh -i <name of USB drive>就我而言,<USB 驱动器名称> 是 sdc。
这将创建两个分区:
- exFAT 文件系统来存储 ISO 映像。
- FAT filesystem to hold EFI boot and other necessary Ventoy files.
Check for the two partitions created on your drive before proceeding.
Copy ISO images to the Ventoy named drive:
# cp <path to source containing ISO file> <path to Ventoy drive(destination)>or
For copying all the ISO images present in the path at once:
cp <path to source directory containing ISO files>*.iso <path to Ventoy drive(destination)>Now, you need to update the boot order of your system to boot from the USB drive. Some systems allow you to select a boot device on boot, but if yours doesn't, then you'll have to change selections in your system's BIOS.
To do that, restart your system and enter the BIOS set up utility. The key to enter into it differs from system to system and can be found by a simple Google search. It's F2 for my Acer Predator Helios 300.
Note: Changing BIOS settings can have negative consequences so be careful.
Navigate to the boot menu option using arrow keys and move the USB drive to the top of the priority order. Remember to save settings and exit so that the changes take effect on the next reboot.
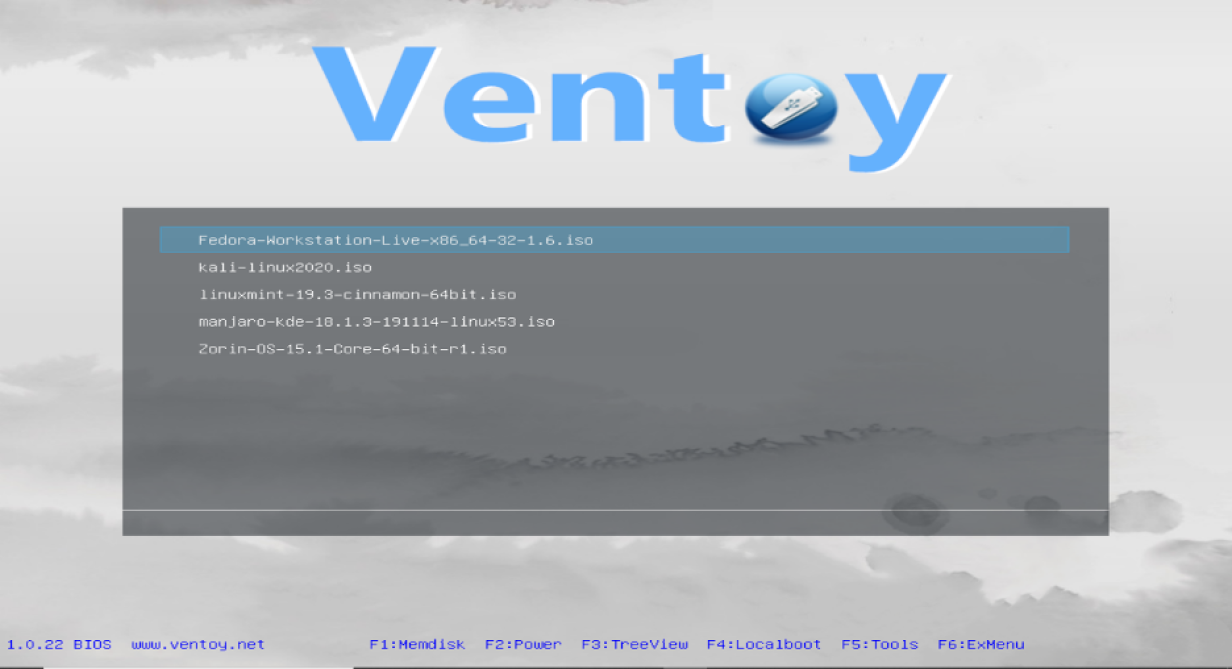
The Ventoy screen displays all the ISO images which I have copied to the USB drive. From here, I can try or install any of them.

[ Free course: Red Hat Satellite Technical Overview. ]
Wrap up
Part of the fun of Linux is the opportunity to try out so many different distributions. While virtual machines are often a good way to do this, multibooting allows you additional benefits, such as better performance and using a distribution natively without emulation. I have found the Ventoy utility to be easy and very helpful. Check it out—and then go hunting for all those distros you've been missing out on.
