
如何在 Ubuntu 22.04 上使用 Nginx 安装 WildFly Java 应用程序服务器
Wildfly 是一个简单、轻量级且灵活的应用程序运行时,用于构建 Java 应用程序。它是用 Java 编写的,可以在 Linux、macOS 和 Windows 操作系统上运行。它是一个企业级、功能齐全的应用程序服务器,提供运行 Java Web 应用程序所需的所有功能。
特点
- 免费和开源
- 模块化且轻量化。
- 通过高效管理节省资源。
- 通过更快的开发节省时间。
本教程将向您展示如何在 Ubuntu 22.04 上使用 Nginx 作为反向代理安装 Wildfly。
先决条件
- 运行 Ubuntu 22.04 的服务器。
- 有效的域名指向您的服务器IP。
- 您的服务器上配置了 root 密码。
更新系统
首先,您需要将所有系统软件包更新到更新版本。您可以通过运行以下命令来更新所有这些内容。
apt update -y
apt upgrade -y
更新所有软件包后,您可以继续下一步。
安装Java JDK
Wildfly 是一个基于 Java 的应用程序。因此,您需要在服务器上安装 Java。您可以使用以下命令安装Java JDK。
apt install default-jdk -y安装 Java 后,您可以使用以下命令验证 Java 版本。
java --version您应该在以下输出中看到 Java 版本。
openjdk 11.0.17 2022-10-18
OpenJDK Runtime Environment (build 11.0.17+8-post-Ubuntu-1ubuntu222.04)
OpenJDK 64-Bit Server VM (build 11.0.17+8-post-Ubuntu-1ubuntu222.04, mixed mode, sharing)
下载并安装 Wildfly
在开始之前,您需要创建一个专用用户和组来运行 Wildfly。您可以使用以下命令创建两者。
groupadd -r wildfly
useradd -r -g wildfly -d /opt/wildfly -s /sbin/nologin wildfly
接下来,使用以下命令下载最新版本的 Wildfly。
wget https://github.com/wildfly/wildfly/releases/download/26.1.3.Final/wildfly-26.1.3.Final.zip下载完成后,使用以下命令解压缩下载的文件。
unzip wildfly-26.1.3.Final.zip接下来,将解压的 Wildfly 目录移动到 /opt 目录。
mv wildfly-26.1.3.Final /opt/wildfly接下来,使用以下命令更改 Wildfly 目录的所有权。
chown -RH wildfly: /opt/wildfly完成后,您可以继续配置 Wildfly。
配置Wildfly
首先,使用以下命令创建 Wildfly 配置目录。
mkdir -p /etc/wildfly接下来,将 Wildfly 配置文件复制到 /etc/wildfly 目录。
cp /opt/wildfly/docs/contrib/scripts/systemd/wildfly.conf /etc/wildfly/接下来,将 Wildfly 服务文件复制到 systemd 目录。
cp /opt/wildfly/docs/contrib/scripts/systemd/wildfly.service /etc/systemd/system/接下来,将 Wildfly launch.sh 文件复制到 /opt/wildfly/bin/ 目录。
cp /opt/wildfly/docs/contrib/scripts/systemd/launch.sh /opt/wildfly/bin/接下来,设置脚本文件的可执行权限。
chmod +x /opt/wildfly/bin/*.sh然后,重新加载 systemd 守护进程以应用更改。
systemctl daemon-reload接下来,启动wildfly服务并将其添加到系统启动中。
systemctl start wildfly
systemctl enable wildfly
您现在可以使用以下命令验证 Wildfly 的状态。
systemctl status wildfly您将得到以下输出。
? wildfly.service - The WildFly Application Server
     Loaded: loaded (/etc/systemd/system/wildfly.service; disabled; vendor preset: enabled)
     Active: active (running) since Wed 2023-02-15 09:34:24 UTC; 4s ago
   Main PID: 20425 (launch.sh)
      Tasks: 61 (limit: 4579)
     Memory: 111.6M
        CPU: 6.919s
     CGroup: /system.slice/wildfly.service
             ??20425 /bin/bash /opt/wildfly/bin/launch.sh standalone standalone.xml 0.0.0.0
             ??20426 /bin/sh /opt/wildfly/bin/standalone.sh -c standalone.xml -b 0.0.0.0
             ??20534 java "-D[Standalone]" -server -Xms64m -Xmx512m -XX:MetaspaceSize=96M -XX:MaxMetaspaceSize=256m -Djava.net.preferIPv4Stac>

Feb 15 09:34:24 ubuntu2204 systemd[1]: Started The WildFly Application Server.
默认情况下,Wildfly 监听端口 8080 和 9990。您可以使用以下命令检查它们。
ss -antpl | grep -i java您应该看到以下输出。
LISTEN 0      4096         0.0.0.0:8443      0.0.0.0:*    users:(("java",pid=20534,fd=498))
LISTEN 0      50         127.0.0.1:9990      0.0.0.0:*    users:(("java",pid=20534,fd=497))
LISTEN 0      4096         0.0.0.0:8080      0.0.0.0:*    users:(("java",pid=20534,fd=495))
配置 Wildfly 管理控制台
默认情况下,Wildfly 管理控制台处于禁用状态。因此,您需要启用它才能从网络浏览器访问 Wildfly。
首先,使用以下命令编辑 Wildfly 配置文件。
nano /etc/wildfly/wildfly.conf更改以下行。
WILDFLY_BIND=127.0.0.1
WILDFLY_CONSOLE_BIND=127.0.0.1
完成后保存并关闭文件。然后,使用以下命令编辑 launch.sh 文件。
nano /opt/wildfly/bin/launch.sh修改以下行:
if [[ "$1" == "domain" ]]; then
    $WILDFLY_HOME/bin/domain.sh -c $2 -b $3 -bmanagement $4
else
    $WILDFLY_HOME/bin/standalone.sh -c $2 -b $3 -bmanagement $4
fi
保存并关闭文件,然后编辑 Wildfly 服务文件。
nano /etc/systemd/system/wildfly.service修改以下行。
ExecStart=/opt/wildfly/bin/launch.sh $WILDFLY_MODE $WILDFLY_CONFIG $WILDFLY_BIND $WILDFLY_CONSOLE_BIND
保存并关闭文件,然后重新加载 systemd 守护程序以应用更改。
systemctl daemon-reload现在,重新启动 Wildfly 服务以实施更改。
systemctl restart wildfly添加 Wildfly 管理用户
接下来,您需要添加管理员用户才能访问 Wildfly 管理控制台。您可以使用以下命令添加它。
sh /opt/wildfly/bin/add-user.sh系统将询问您要添加的用户类型:
What type of user do you wish to add?
 a) Management User (mgmt-users.properties)
 b) Application User (application-users.properties)
(a): a
提供您的新用户详细信息,如下所示:
Using the realm 'ManagementRealm' as discovered from the existing property files.
Username : wadmin
Password recommendations are listed below. To modify these restrictions edit the add-user.properties configuration file.
 - The password should be different from the username
 - The password should not be one of the following restricted values {root, admin, administrator}
 - The password should contain at least 8 characters, 1 alphabetic character(s), 1 digit(s), 1 non-alphanumeric symbol(s)
Password :
Re-enter Password :
系统会询问您希望该用户属于哪个组:
What groups do you want this user to belong to? (Please enter a comma separated list, or leave blank for none)[ ]:
只需按回车键即可。您应该看到以下输出。
About to add user 'wadmin' for realm 'ManagementRealm'
Is this correct yes/no? yes
Added user 'wadmin' to file '/opt/wildfly/standalone/configuration/mgmt-users.properties'
Added user 'wadmin' to file '/opt/wildfly/domain/configuration/mgmt-users.properties'
Added user 'wadmin' with groups  to file '/opt/wildfly/standalone/configuration/mgmt-groups.properties'
Added user 'wadmin' with groups  to file '/opt/wildfly/domain/configuration/mgmt-groups.properties'
Is this new user going to be used for one AS process to connect to another AS process?
e.g. for a slave host controller connecting to the master or for a Remoting connection for server to server EJB calls.
yes/no? yes
To represent the user add the following to the server-identities definition
为 Wildfly 配置 Nginx
至此,Wildfly 已安装并配置为在本地主机上运行。现在,您需要将 Nginx 配置为反向代理才能访问 Wildfly Web 界面。
首先,使用以下命令安装 Nginx 软件包。
apt install nginx -y接下来,创建 proxy_headers 配置文件。
nano /etc/nginx/conf.d/proxy_headers.conf添加以下配置:
proxy_set_header Host $host;
proxy_set_header X-Forwarded-Proto $scheme;
add_header Front-End-Https on;
add_header Cache-Control no-cache;
保存并关闭文件,然后创建一个新的虚拟主机配置文件。
nano /etc/nginx/conf.d/wildfly.conf添加以下配置。
server {
  listen          80;
  server_name     wildfly.example.com;

  location / {
    include conf.d/proxy_headers.conf;
    proxy_pass http://127.0.0.1:8080;
  }

  location /management {
    include conf.d/proxy_headers.conf;
    proxy_pass http://127.0.0.1:9990/management;
  }

  location /console {
    include conf.d/proxy_headers.conf;
    proxy_pass http://127.0.0.1:9990/console;
  }

  location /logout {
    include conf.d/proxy_headers.conf;
    proxy_pass http://127.0.0.1:9990/logout;
  }

  location /error {
    include conf.d/proxy_headers.conf;
    proxy_pass http://127.0.0.1:9990;
  }

}
保存文件,然后验证 Nginx 是否存在任何语法配置错误。
nginx -t如果一切正常,您将得到以下输出。
nginx: the configuration file /etc/nginx/nginx.conf syntax is ok
nginx: configuration file /etc/nginx/nginx.conf test is successful
最后,重新启动 Nginx 服务以实施更改。
systemctl restart nginx您可以使用以下命令验证 Nginx 服务的状态。
systemctl status nginx您应该看到以下输出。
? nginx.service - A high performance web server and a reverse proxy server
     Loaded: loaded (/lib/systemd/system/nginx.service; enabled; vendor preset: enabled)
     Active: active (running) since Wed 2023-02-15 09:38:18 UTC; 1s ago
       Docs: man:nginx(8)
    Process: 21027 ExecStartPre=/usr/sbin/nginx -t -q -g daemon on; master_process on; (code=exited, status=0/SUCCESS)
    Process: 21028 ExecStart=/usr/sbin/nginx -g daemon on; master_process on; (code=exited, status=0/SUCCESS)
   Main PID: 21029 (nginx)
      Tasks: 3 (limit: 4579)
     Memory: 3.4M
        CPU: 62ms
     CGroup: /system.slice/nginx.service
             ??21029 "nginx: master process /usr/sbin/nginx -g daemon on; master_process on;"
             ??21030 "nginx: worker process" "" "" "" "" "" "" "" "" "" "" "" "" "" "" "" "" "" "" "" "" "" "" "" "" "" "" ""
             ??21031 "nginx: worker process" "" "" "" "" "" "" "" "" "" "" "" "" "" "" "" "" "" "" "" "" "" "" "" "" "" "" ""

Feb 15 09:38:18 ubuntu2204 systemd[1]: Starting A high performance web server and a reverse proxy server...
Feb 15 09:38:18 ubuntu2204 systemd[1]: Started A high performance web server and a reverse proxy server.
访问 Wildfly 管理界面
现在,打开网络浏览器并使用 URL http://wildfly.example.com/console 访问 Wildfly 管理界面。系统会要求您提供 Wildfly 管理凭据,如下所示:
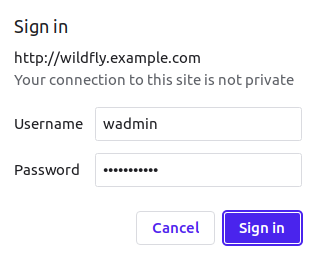
提供您的管理员用户名、密码,然后单击“登录”按钮。您应该在以下屏幕上看到 Wildfly 仪表板。
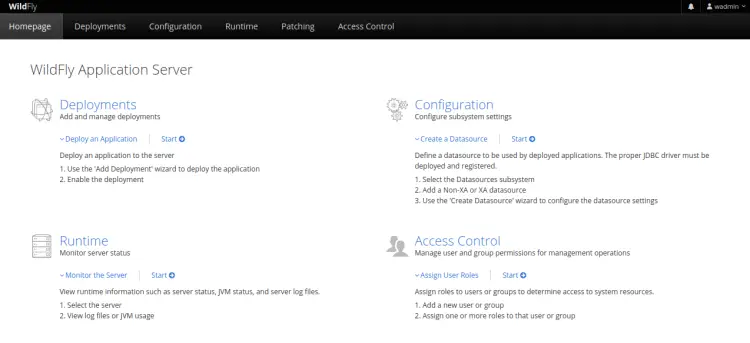
您还可以使用 URL http://wildfly.example.com 访问 Wildfly 默认页面。您应该会看到以下屏幕。

结论
恭喜!您已经在 Ubuntu 22.04 服务器上成功安装了 Wildfly,并使用 Nginx 作为反向代理。您现在可以开始使用 Wildfly 平台构建令人惊叹的应用程序。如果您有任何疑问,请随时问我。